Установка DVR сервера под управлением zoneminder (Очень подробно)
 Данная статья писалась еще в 2011 году, но так как я все никак не мог ее закончить, она у меня валялась в черновиках.
Немного подумав, я решил, что стоит опубликовать ее, ибо как пособие она будет полезна, а если что-то будет отсутствовать — пишите в комментарии, дополню.
Понадобилось мне как то сделать сервер для видео наблюдения, который мог бы писать картинку по тревоге (движению), работал бы на ОС Linux (в моем случае на Ubuntu), который мог бы мне показать что творится в моем уголке в любой точке мира (точнее говоря чтобы я мог смотреть события и по мобильному телефону с гребанным глюченным МТС интернетом) ну вот как то так … А назову я этот проект «DVR сервер».
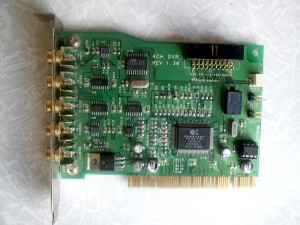
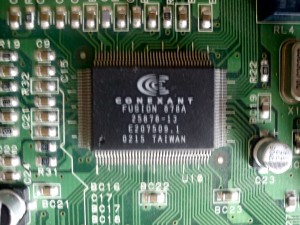
Для реализации своей «пошлой мечты» или чьей то просьбы я в качестве ОС выбрал Ubuntu Linux 10.10, в качестве программы выбрал ZoneMinder. В качестве железки был выбран старый компьютер Intel Pentium 4 с материнской платой ASRock P4i65G (плата была заменена на Asus P4P800SE, так как ASRock гавно!) и 512 мегабайтами оперативной памяти. Так же была использована 4-х канальная DVR плата на чипе Fusion 878A. Возможности этого ПО я буду рассматривать по ходу написания моей статьи … фотографии и ссылки — прилагаются … В данной статье я так же рассмотрю вопрос тонкой настройки ZM, его нормального перевода на русский язык и небольшое видоизменение внешнего вида консоли. Для чего ? ну не нравится мне однообразие …
Ну что же, начнем ! …
1.Установка необходимого ПО для работы с ZoneMinder
Представим что на нашей железке установлена OC Ubuntu Linux 10.10. Для начала обновим все компоненты:
$ sudo apt-get update
$ sudo apt-get upgrade
После успешной отработки этих команд приступим к установке необходимого ПО. Установим программу tvtime для проверки работоспособности платы и камер, так же установим поддержку SSH на наш сервер, чтобы после его можно было спрятать в шкаф:
$ sudo apt-get install tvtime openssh-server openssh-client v4l-conf
Далее по желанию можно установить WebMin, как указано в этом руководстве.
Еще не помешает увеличить количество общей памяти, которую сможет использовать ZM. Для этого откроем файл…
$ sudo vim /etc/sysctl.conf
… и добавим туда строчку (ели ее нет) …
kernel.shmmax = 167772160
Теперь устанавливаем apache, php, mysql и все необходимые модули:
$ sudo apt-get install apache2 mysql-server php5 libapache2-mod-php5
Перезагружаем apache2 и проверяем работу web сервера пройдя по адресу http://localhost. Должно быть написано «IT WORKS!»
$ sudo /etc/init.d/apache2 restart
Далее устанавливаем phpmyadmin:
$ sudo apt-get install phpmyadmin
Проверяем phpmyadmin пройдя по адресу http://localhost/phpmyadmin.
Учитывая, что моя железка находится за маршрутизатором, нам не нужно палить 80 порт, так как он занят уже другой железкой. Поэтому поправим некоторую конфигурацию apache, а точнее изменим порты которые будет слушать apache:
$ sudo vim /etc/apache2/ports.conf
Приводим его к виду:
Listen 8080
Далее правим конфиг default хоста:
$ sudo vim /etc/apache2/sites-available/default
Там переделываем строки <VirtualHost *:80> на <VirtualHost *:8080>
Перезапускаем сервер:
$ sudo /etc/init.d/apache2 restart
Проверяем сервер по адресу http://localhost:8080 — там мы так же должны увидеть надпись «IT WORKS!»
2.Установка ZoneMinder
Для установки этого ПО нам не придется скачивать и компилировать какие либо файлы, мы можем запросто воспользоваться репозитарием нашей Ubuntu, поэтому набираем:
$ sudo apt-get install zoneminder
Далее чтобы по адресу http://localhost:8080/zm мы увидели консоль — сделаем ссылку для конфигурации apache:
$ sudo ln -s /etc/zm/apache.conf /etc/apache2/conf.d/zoneminder.conf
… и перезагрузим конфиги …
$ sudo /etc/init.d/apache2 force-reload
Теперь у нас есть рабочая консоль ZM … если она доступна по адресу http://localhost:8080/zm, то приступим к настройке нашей dvr платы.
3.Настройка DVR платы.
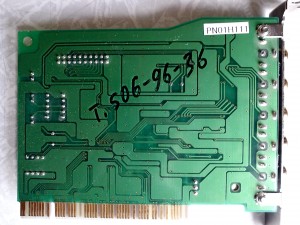
Поиски недорогого нормального, можно и старого девайса для захвата видеосигнала с камер с трудом увенчались с успехом. Долго мне пришлось оббегать в начале Буденовский, потом уже Савеловский, но плата была найдена! Вот собственно она:
После того, как я ее вставил в систему, Linux ее определил как SIMUS GVC1100. Вроде бы все верно, да и на картинках из интернета она была практически схожа на вид, но работала она не корректно. Проблема была в том, что при ее проверке работал только video0 причем любая программа при выборе видео канала показывала картинку только с Composite0. Поэтому нам немного пришлось поплясать с бубном. Для начала я проделал операцию, которая расписана в этой статье. Таким образом я сузил круг поиска. Далее я методом тыка начал пробовать платы из этого списка… как это делалось:
Выгружаем модуль bttv
$ sudo rmmod bttv
Загружаем модуль с указанной моделью платы (указывать тут):
$ sudo modprobe -v bttv card=0x5d tuner=-1 autoload=0
Проверяем все ли правильно сделали:
$ sudo v4l-info | head -n 10 | grep card
card                    : "BT878 video (IDS Eagle)"
Если да, то запускаем tvtime и смотрим как что работает. Если все каналы работают и нормально переключаются то едем пить мартини :)… если нет, то опять выгружаем модуль, загружаем с другой платой и проверяем … Надеюсь у вас все ограничится менее тяжелыми муками … В моем случае плата завелась как IDS EAGLE 0x5d. Хз, может быть это и она … но главное работает. Осталось сделать так, чтобы плата продолжала работать и после перезагрузки, для этого создадим файл:
$ sudo vim /etc/modprobe.d/bttv.conf
и внесем в него следующее содержимое:
options bttv card=0x5d tuner=-1
Для верности перезагрузим машину и проверим снова:
$ sudo v4l-info | head -n 10 | grep card
card                    : "BT878 video (IDS Eagle)"
Если все так, то продолжаем ….
4.Настройка ZoneMinder
Отлично! Все работает, все красиво, поэтому приступаем к настройке ZM. Для начала необходимо добавить в группу Video пользователя www-data. Сделать это можно либо с помощью WebMin, либо командой:
$ sudo adduser www-data video
Сделать это нужно, чтобы следующие 2 часа мы ковыряли настройки а не выясняли почему нет картинки. Теперь заходим по адресу http://localhost:8080/zm.
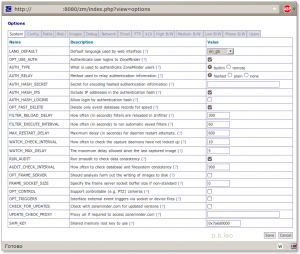
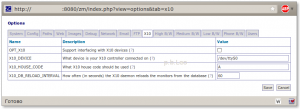
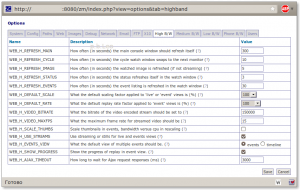
Далее проходим по ссылке Options. Здесь будут описаны все опции которые есть в ZM.
Перевод данной консоли я осуществлял без особых знаний английского, поэтому в начале будет Русская версия, а ниже уже версия на английском языке.
Приму любую критику в свой адрес, так как у некоторых параметров был непонятен смысл. Так же кто готов помочь с качественным переводом — буду рад!
LANG_DEFAULT — Локализация по умолчанию (я выбрал Русский);
Default language used by web interface. ZoneMinder allows the web interface to use languages other than English if the appropriate language file has been created and is present. This option allows you to change the default language that is used from the shipped language, British English, to another language.
Немного о Русском языке консоли.
Файлы с Русским языком находятся в директории /user/share/zoneminder/lang. Файл ru_ru.php сохранен в кодировке Koi8_ru, что нельзя назвать отличным решением. Поэтому я с помощью Декодера расположенного на сайте Артемия Лебедева перевел его в utf_8, далее при помощи gedit файл так же был сохранен в кодировке utf_8 и заменен предыдущей, криво не до переведенной версии. Данный файл вы можете скачать по этой ссылке. (ссылка появится тогда, когда я доделаю файл)
Но немного пощелкав интерфейс я понял, что не весь перевод храниться в файле локализации. Ссылки пояснений и описание опций находится в в базе данных zm, таблице Config. Сама таблица сохранена в кодировке latin1_swedish_ci, поэтому русские символы там не отображаются. Решение данной проблемы я пока не реализовал, но поверьте, как что сделаю — вы увидите это здесь.
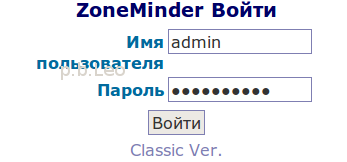
Так же у ZM есть скин для мобильных устройств. Чтобы его увидеть вам нужно пройти по ссылке http://localhost:8080/zm/index.php?skin=mobile. Но что мне не понравилось — это то что отсутствует ссылка на переход в mobile версию и возврат в классическую версию. Поэтому я проделал следующие действия:
Открываем файл login.php шаблона classic …
$ sudo vim /usr/share/zoneminder/skins/classic/views/login.php
… находим там строчку </form> и после нее добавляем …
<p> <a href="/zm/index.php?skin=mobile">Mobile Ver.</a></p>
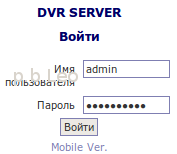 … сохраняем файл и при просмотре страницы авторизации ниже будет ссылка смены шаблона в мобильную версию.
Аналогично проделаем для шаблона mobile, открыть файл:
sudo vim /usr/share/zoneminder/skins/mobile/views/login.php
… найти там строчку </form> и после нее добавляем …
<p><a href="/zm/index.php?skin=classic">Classic Ver.</a></p>.
Второй косяк который мне не порадовал — при просмотре мобильной версии с телефона русские символы отображаются как знаки вопросов. Исправляется это методом удаления строчки из нужного файла, для этого откроем этот файл:
$ sudo vim /usr/share/zoneminder/skins/mobile/includes/functions.php
Найдем там строчку
echo( '<?xml version="1.0" encoding="iso-8859-1" ?>'."\n" );
и удалим ее! Таким образом кодировка файла будет отображаться та, которая указанна в файле …/lang/ru_ru.php, в нашем случае это utf8.
Продолжим настройку ZM.
OPT_USE_AUTH — Включить аутентификацию пользователей по логину (Выбираем да. Далее после сохранения параметров вам нужно авторизоваться под пользователем admin и паролем admin. Пароль пользователю можно поменять во вкладке Users, о чем будет сказано позднее);
Authenticate user logins to ZoneMinder. ZoneMinder can run in two modes. The simplest is an entirely unauthenticated mode where anyone can access ZoneMinder and perform all tasks. This is most suitable for installations where the web server access is limited in other ways. The other mode enables user accounts with varying sets of permissions. Users must login or authenticate to access ZoneMinder and are limited by their defined permissions.
AUTH_TYPE — Метод авторизации пользователей в консоли ZM. В параметрах можно выбрать как встроенный, так и удаленный (Оставил по умолчанию);
What is used to authenticate ZoneMinder users. ZoneMinder can use two methods to authenticate users when running in authenticated mode. The first is a builtin method where ZoneMinder provides facilities for users to log in and maintains track of their identity. The second method allows interworking with other methods such as http basic authentication which passes an independently authentication ‘remote’ user via http. In this case ZoneMinder would use the supplied user without additional authentication provided such a user is configured ion ZoneMinder.
AUTH_RELAY — Метод передачи информации об аутентификации. Возможны параметры hashed plain none. Первый параметр хеширует передаваемые данные, второй метод передает данные в открытом виде, третий отключает проверку подлинности передачи данных. Последний лучше использовать в том случае, если ZM изолирован от сети (Здесь я установил первый метод);
Method used to relay authentication information. When ZoneMinder is running in authenticated mode it can pass user details between the web pages and the back end processes. There are two methods for doing this. This first is to use a time limited hashed string which contains no direct username or password details, the second method is to pass the username and passwords around in plaintext. This method is not recommend except where you do not have the md5 libraries available on your system or you have a completely isolated system with no external access. You can also switch off authentication relaying if your system is isolated in other ways.
AUTH_HASH_SECRET — секретное слово для шифрования хеша. Если ZM работает в режиме хеширование проверки подлинности, то здесь нужно написать какое нибудь кодовое слово или фразу (ну, вписал…);
Secret for encoding hashed authentication information. When ZoneMinder is running in hashed authenticated mode it is necessary to generate hashed strings containing encrypted sensitive information such as usernames and password. Although these string are reasonably secure the addition of a random secret increases security substantially.
AUTH_HASH_IPS — Включить ip адрес в хеш-аутентификацию (Оставил по умолчанию);
Include IP addresses in the authentication hash. When ZoneMinder is running in hashed authenticated mode it can optionally include the requesting IP address in the resultant hash. This adds an extra level of security as only requests from that address may use that authentication key. However in some circumstances, such as access over mobile networks, the requesting address can change for each request which will cause most requests to fail. This option allows you to control whether IP addresses are included in the authentication hash on your system. If you experience intermitent problems with authentication, switching this option off may help.
AUTH_HASH_LOGINS — разрешать авторизоваться в системе в обход страницы авторизации (авторизоваться по хеш-аутентификации). Для использования этого параметра необходимо задать уникальное кодовое слово или фразу в параметре AUTH_HASH_SECRET (Оставил по умолчанию);
Allow login by authentication hash. The normal process for logging into ZoneMinder is via the login screen with username and password. In some circumstances it may be desirable to allow access directly to one or more pages, for instance from a third party application. If this option is enabled then adding an ‘auth’ parameter to any request will include a shortcut login bypassing the login screen, if not already logged in. As authentication hashes are time and, optionally, IP limited this can allow short-term access to ZoneMinder screens from other web pages etc. In order to use this the calling application will hae to generate the authentication hash itself and ensure it is valid. If you use this option you should ensure that you have modified the ZM_AUTH_HASH_SECRET to somethign unique to your system.
OPT_FAST_DELETE — Если данная опция включена, то в таком случае ZM удаляет те события, которые не существуют в БД (Осталась по умолчанию);
Delete only event database records for speed. Normally an event created as the result of an alarm consists of entries in one or more database tables plus the various files associated with it. When deleting events in the browser it can take a long time to remove all of this if your are trying to do a lot of events at once. It is recommended that you set this option which means that the browser client only deletes the key entries in the events table, which means the events will no longer appear in the listing, and leaves the zmaudit daemon to clear up the rest later.
FILTER_RELOAD_DELAY — Как часто (в секундах) фильтры перезагружаются в zmfilter. Данный параметр указывает как часто актуализируется информация о фильтрах из базы данных в zmfilter (Оставил по умолчанию);
How often (in seconds) filters are reloaded in zmfilter. ZoneMinder allows you to save filters to the database which allow events that match certain criteria to be emailed, deleted or uploaded to a remote machine etc. The zmfilter daemon loads these and does the actual operation. This option determines how often the filters are reloaded from the database to get the latest versions or new filters. If you don’t change filters very often this value can be set to a large value.
FILTER_EXECUTE_INTERVAL — Как часто (в секундах) фильтры сохраняются в zmfilter (Оставил по умолчанию);
How often (in seconds) to run automatic saved filters. ZoneMinder allows you to save filters to the database which allow events that match certain criteria to be emailed, deleted or uploaded to a remote machine etc. The zmfilter daemon loads these and does the actual operation. This option determines how often the filters are executed on the saved event in the database. If you want a rapid response to new events this should be a smaller value, however this may increase the overall load on the system and affect performance of other elements.
MAX_RESTART_DELAY — Максимальная задержка при перезагрузки процесса zmdc. В случае какой либо ошибки процесс перезагружается, данный параметр нужен для того, чтобы не нагрузить сервер бесконечными перезапусками (Оставил по умолчанию);
Maximum delay (in seconds) for daemon restart attempts. The zmdc (zm daemon control) process controls when processeses are started or stopped and will attempt to restart any that fail. If a daemon fails frequently then a delay is introduced between each restart attempt. If the daemon stills fails then this delay is increased to prevent extra load being placed on the system by continual restarts. This option controls what this maximum delay is.
WATCH_CHECK_INTERVAL — Как часто проверять, что процесс захвата изображения не завис (не закрылся) … (оставил по умолчанию);
How often to check the capture daemons have not locked up. The zmwatch daemon checks the image capture performance of the capture daemons to ensure that they have not locked up (rarely a sync error may occur which blocks indefinately). This option determines how often the daemons are checked.
WATCH_MAX_DELAY — Максимальная задержка после последнего отснятого кадра (Поставил 30);
The maximum delay allowed since the last captured image. The zmwatch daemon checks the image capture performance of the capture daemons to ensure that they have not locked up (rarely a sync error may occur which blocks indefinately). This option determines the maximum delay to allow since the last captured frame. The daemon will be restarted if it has not captured any images after this period though the actual restart may take slightly longer in conjunction with the check interval value above.
RUN_AUDIT — Запускать zmaudit для проверки целостности данных. Данный процесс проверяет записи в БД и файловой системе на соответствие (оставил по умолчанию включенным);
Run zmaudit to check data consistency. The zmaudit daemon exists to check that the saved information in the database and on the filesystem match and are consistent with each other. If an error occurs or if you are using ‘fast deletes’ it may be that database records are deleted but files remain. In this case, and similar, zmaudit will remove redundant information to synchronise the two data stores. This option controls whether zmaudit is run in the background and performs these checks and fixes continuously. This is recommended for most systems however if you have a very large number of events the process of scanning the database and filesystem may take a long time and impact performance. In this case you may prefer to not have zmaudit running unconditionally and schedule occasional checks at other, more convenient, times.
AUDIT_CHECK_INTERVAL — Интервал запуска (в секундах) zmaudit для проверки соответствия записей (Установлено по умолчанию 900 сек);
How often to check database and filesystem consistency. The zmaudit daemon exists to check that the saved information in the database and on the filesystem match and are consistent with each other. If an error occurs or if you are using ‘fast deletes’ it may be that database records are deleted but files remain. In this case, and similar, zmaudit will remove redundant information to synchronise the two data stores. The default check interval of 900 seconds (15 minutes) is fine for most systems however if you have a very large number of events the process of scanning the database and filesystem may take a long time and impact performance. In this case you may prefer to make this interval much larger to reduce the impact on your system. This option determines how often these checks are performed.
OPT_FRAME_SERVER — (Отключена по умолчанию, смысл этой опции я не понял);
Should analysis farm out the writing of images to disk. In some circumstances it is possible for a slow disk to take so long writing images to disk that it causes the analysis daemon to fall behind especially during high frame rate events. Setting this option to yes enables a frame server daemon (zmf) which will be sent the images from the analysis daemon and will do the actual writing of images itself freeing up the analysis daemon to get on with other things. Should this transmission fail or other permanent or transient error occur, this function will fall back to the analysis daemon.
FRAME_SOCKET_SIZE — максимальный размер буфера передачи для отдельного сокета. Полезно, если снимки нестандартных размеров (Оставил по умолчанию);
Specify the frame server socket buffer size if non-standard. For large captured images it is possible for the writes from the analysis daemon to the frame server to fail as the amount to be written exceeds the default buffer size. While the images are then written by the analysis daemon so no data is lost, it defeats the object of the frame server daemon in the first place. You can use this option to indicate that a larger buffer size should be used. Note that you may have to change the existing maximum socket buffer size on your system via sysctl (or in /proc/sys/net/core/wmem_max) to allow this new size to be set. Alternatively you can change the default buffer size on your system in the same way in which case that will be used with no change necessary in this option.
OPT_CONTROL — Поддержка управляемых камер (например PTZ). С помощью ZM можно ограниченно управлять камерами, есть образцы камер которые можно дополнить (Так как у меня аналоговые камеры — значения я оставил по умолчанию в отключенном состоянии);
Support controllable (e.g. PTZ) cameras. ZoneMinder includes limited support for controllable cameras. A number of sample protocols are included and others can easily be added. If you wish to control your cameras via ZoneMinder then select this option otherwise if you only have static cameras or use other control methods then leave this option off.
OPT_TRIGGERS — Включить поддержку внешних пусковых механизмов (триггеров). С помощью данной поддержки ZM может взаимодействовать с внешними триггерами, для включения или выключения сигнализации (Так как у меня такова нет — значения я оставил по умолчанию в отключенном состоянии);
Interface external event triggers via socket or device files. ZoneMinder can interact with external systems which prompt or cancel alarms. This is done via the zmtrigger.pl script. This option indicates whether you want to use these external triggers. Most people will say no here.
CHECK_FOR_UPDATES — Проверять новые версии ZM на официальном сайте. (Оставил по умолчанию — нет);
Check with zoneminder.com for updated versions. From ZoneMinder version 1.17.0 onwards new versions are expected to be more frequent. To save checking manually for each new version ZoneMinder can check with the zoneminder.com website to determine the most recent release. These checks are infrequent, about once per week, and no personal or system information is transmitted other than your current version number. If you do not wish these checks to take place or your ZoneMinder system has no internet access you can switch these check off with this configuration variable.
UPDATE_CHECK_PROXY — Адрес прокси сервера вида http://<proxy host>:<proxy port>/ для доступа к сайту zoneminder.com для проверки обновлений (По умолчанию пусто);
Proxy url if required to access zoneminder.com. If you use a proxy to access the internet then ZoneMinder needs to know so it can access zoneminder.com to check for updates. If you do use a proxy enter the full proxy url here in the form of http://<proxy host>:<proxy port>/
SHM_KEY — Корневой ключ для использования общей памяти. (Оставил значение по умолчанию — пусто);
Shared memory root key to use. ZoneMinder uses shared memory to speed up communication between modules. To identify the right area to use shared memory keys are used. This option controls what the base key is, each monitor will have it’s Id or’ed with this to get the actual key used. You will not normally need to change this value unless it clashes with another instance of ZoneMinder on the same machine. Only the first four hex digits are used, the lower four will be masked out and ignored.
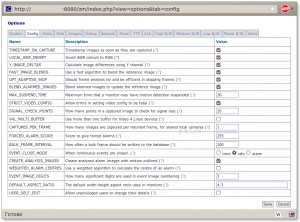
TIMESTAMP_ON_CAPTURE — Установить пометку с датой и временем на изображении (Я установил да);
Timestamp images as soon as they are captured. ZoneMinder can add a timestamp to images in two ways. The default method, when this option is set, is that each image is timestamped immediately when captured and so the image held in memory is marked right away. The second method does not timestamp the images until they are either saved as part of an event or accessed over the web. The timestamp used in both methods will contain the same time as this is preserved along with the image. The first method ensures that an image is timestamped regardless of any other circumstances but will result in all images being timestamped even those never saved or viewed. The second method necessitates that saved images are copied before being saved otherwise two timestamps perhaps at different scales may be applied. This has the (perhaps) desirable side effect that the timestamp is always applied at the same resolution so an image that has scaling applied will still have a legible and correctly scaled timestamp.
LOCAL_BGR_INVERT — Инвертировать BGR в RGB. Некоторые DVR платы или камеры могут на кадрах оставлять странные световые оттенки, поэтому можно попробовать включить или выключить данный параметр. Данная опция работает только на локальных камерах (Оставил по умолчанию);
Invert BGR colours to RGB. Some cameras or video cards capture images in BGR (Blue-Green-Red) order even when the palette says RGB. If you see strange colours casts on your images then it may be worth trying this option to see if that corrects the issue. Note this option will apply only to local cameras and not those over a network.
Y_IMAGE_DELTAS — Рассчитывать разницу изображений с использованием Y канала. Когда zm устанавливает различия между изображениями он генерирует изображение «дельта» с оттенками серого между ними. Для этого он определяет выявленные различия между различными RGB цветовыми компонентами и рассчитывает значения оттенков серого. При успешном расчете этого параметра, то будет рассчитываться конвертация каждого пикселя в значение яркости (Y из YUV), а затем будет искать разницу между ними. При не успешном расчете, рассчитывается разница среднего различия каждого цвета, что является простым расчетом. Используя значение Y расчет будет более точным и рассчитываться от будет до 15% быстрее (Оставил по умолчанию включенным);
Calculate image differences using Y channel.When ZoneMinder tries to establish the differences between two colour images it generates a greyscale ‘delta’ image between the two sets of images. In order to do this it determines the differences found between the different RGB colour components and calculates a greyscale value representing this. If this option is set then a calculation will be made to convert each pixel of the image into a brightness value (Y from YUV) and then find the difference between the two. If this option is not set then the resulting difference is determined as the average of the differences of each colour which is a simple calculation. Using the Y value is likely to be more accurate and is up to 15% faster. Only switch this option off if Y based deltas do not work as well for you as RGB ones.
FAST_IMAGE_BLENDS — Использовать быстрый алгоритм для смешивания необработанного изображения. В большинстве режимов работы ZoneMinder нуждается в смешивании захваченного изображения с хранящимся необработанным изображением, чтобы обновить его для следующего изображения. Результат обычного смешивания в процентах, заданного для монитора, определяет насколько новое изображение отражает необработанное изображение. Есть два доступных для этого метода. Если эта опция включена, тогда применяется базовый расчет, что значит (хотя он и может делать все быстро и достаточно точно (благодаря зацикленности)) что реальный диапазон пиксельных значений в необработанном изображении может быть уменьшен в отличии от того, что в захваченном изображении, например пиксель может достигнуть только максимум, скажем, 250, при том, что захваченное изображение единообразно до 255. Если у вас установлен малый порог разницы пикселей, это может вызвать множество ненастоящих тревог. Альтернативный вариант: выключить эту опцию, что повлечет за собой сохранения дополнительного набора значений, что в свою очередь исключит любые точностные ошибки зацикленности (замыкания, закругления, хз). Это более точно, но до 6 раз медленнее и на самом деле не так необходимо, пока у вас нет проблем со стандартным способом (Оставил по умолчанию);
Use a fast algorithm to blend the reference image. In most modes of operation ZoneMinder needs to blend the captured image with the stored reference image to update it for the next image. The reference blend percentage specified for the monitor controls how much the new image affects the reference image. There are two methods that are available for this. If this option is set then a basic calculation is applied which though fast and fairly accurate can (due to rounding) mean that the actual range of pixel values in the reference image may be reduced from that in the captured image, e.g. a pixel may only be able to achieve a maximum of say 250 while the captured image is consistently at 255. If you also have a small minimum pixel difference threshold this can cause multiple bogus alarms. The alternative is to switch this option off which stores an additional set of temporary values which eliminate any significant rounding errors. This is more accurate though up to 6 times slower and should not really be necessary unless you find problems with the default method.
OPT_ADAPTIVE_SKIP — Должен ли анализ кадра пытаться обработать пропущенные кадры. В старых версиях ZM демон анализа пытался работать одновременно с демоном захвата. Это вызывало некоторые побочные эффекты, из-за отсутствующего куска первого кадра, из за чего срабатывал сигнал тревоги, так как кадры при аварийном срабатывании должны записаться на диск и БД, прежде чем обработать следующий кадр, приводя к задержке между первыми и вторыми кадрами событием. Установка данной опции включает более новый адаптивный алгоритм, при котором демон анализа пытается обработать на столько много кадров, на сколько это возможно, пропуская кадры только в том случае, если есть опасность того что демон захвата перезапишет уже обрабатываемые кадры. Пропуска кадров величина не постоянная, она зависит от размера кольцевого буфера и оставшегося в нем места. Включение этой опции даст значительно лучший охват на начало тревоги вместо смещения любых пропущенных кадров к середине или концу события. Однако вы должны опасаться, что это даст эффект превращения демона анализа во что-то находящееся сразу за демоном захвата и при возникновении событий и при значительных скоростях захвата кадров адаптивный алгоритм возможно не будет выдерживать и не будет иметь время реакции на быстрое нарастание захваченных кадров и таким образом это приведет к переполнению буфера (Оставил по умолчанию включенным);
Should frame analysis try and be efficient in skipping frames. In previous versions of ZoneMinder the analysis daemon would attempt to keep up with the capture daemon by processing the last captured frame on each pass. This would sometimes have the undesirable side-effect of missing a chunk of the initial activity that caused the alarm because the pre-alarm frames would all have to be written to disk and the database before processing the next frame, leading to some delay between the first and second event frames. Setting this option enables a newer adaptive algorithm where the analysis daemon attempts to process as many captured frames as possible, only skipping frames when in danger of the capture daemon overwriting yet to be processed frames. This skip is variable depending on the size of the ring buffer and the amount of space left in it. Enabling this option will give you much better coverage of the beginning of alarms whilst biasing out any skipped frames towards the middle or end of the event. However you should be aware that this will have the effect of making the analysis daemon run somewhat behind the capture daemon during events and for particularly fast rates of capture it is possible for the adaptive algorithm to be overwhelmed and not have time to react to a rapid build up of pending frames and thus for a buffer overrun condition to occur.
BLEND_ALARMED_IMAGES — Давать оценку принудительной тревоге. Утилита zmu может использоваться для вызова сигнала тревоги на монитор, а не полагаться на алгоритмы обнаружения движения. Эта опция определяет какую оценку дать аварийному сигналу, чтобы отличить его от регулярных сигналов. Нужно задать числе не более 255 (Оставил по умолчанию 255);
Blend alarmed images to update the reference image. To detect alarms ZoneMinder compares an image with a reference image which is formed from a composite of the previous images. This option determines whether images that cause events are included in this process. Doing so may increase the precision of the alarmed region but can cause problems if wholescale lighting changes cause alarms as this would not get fed back into the image and an alarm may persist indefinately. A better way to achive the same effect in most cases is to lower substantially the reference blend persentage in specific monitors.
MAX_SUSPEND_TIME — Максимальное время, при котором монитор может быть с приостановленным детектором движения. ZoneMinder позволяет монирторам приостанавливать детектирование движения, (я так понимаю например) при панорамировании камеры. Обычно это доверяется на операторскому восстановлению детектированию движения после того как выключили, т.о. монитор может оказаться в постоянно приостановленном состоянии. Эта опция позволяет вам установить максимальное время, в течение которого камера может быть приостановлена до того, как она автоматически не восстановит детектирование движения (Оставил по умолчанию — 30);
Maximum time that a monitor may have motion detection suspended. ZoneMinder allows monitors to have motion detection to be suspended, for instance while panning a camera. Ordinarily this relies on the operator resuming motion detection afterwards as failure to do so can leave a monitor in a permanently suspended state. This setting allows you to set a maximum time which a camera may be suspended for before it automatically resumes motion detection. This time can be extended by subsequent suspend indications after the first so continuous camera movement will also occur while the monitor is suspended.
STRICT_VIDEO_CONFIG — Позволить ошибкам при изменении видео конфигурации быть фатальными (как я понял иметь пометку fatal). Некоторые ошибки при настройке видео устройств могут выдаваться при настройке различных видео атрибутов, хотя по факту операция была успешной. Отключение данной настройки позволит выводиться этим ошибкам без отключения демона видеосъемки. Но имейте в виду что в этом случае все ошибки будут игнорироваться, включая те, которые являются реальным, из-за чего видео может не корректно работать. Данную опцию стоит использовать с осторожностью (Оставил по умолчанию);
Allow errors in setting video config to be fatal. With some video devices errors can be reported in setting the various video attributes when in fact the operation was successful. Switching this option off will still allow these errors to be reported but will not cause them to kill the video capture daemon. Note however that doing this will cause all errors to be ignored including those which are genuine and which may cause the video capture to not function correctly. Use this option with caution.
SIGNAL_CHECK_POINTS — Сколько точек проверяется в захваченном изображении для определения потери сигнала. Для камер, подключенных локально ZM может проверить отсутствие сигнала проверяя определенное количество случайных точек в каждом полученном изображении. В случае если при проверке все эти точки будут одного и того же цвета, то ZM расценит что сигнал от камеры утерян. В данном параметре необходимо указывать, какое количество точек необходимо проверять (Оставил по умолчанию);
How many points in a captured image to check for signal loss. For locally attached video cameras ZoneMinder can check for signal loss by looking at a number of random points on each captured image. If all of these points are set to the same fixed colour then the camera is assumed to have lost signal. When this happens any open events are closed and a short one frame signal loss event is generated, as is another when the signal returns. This option defines how many points on each image to check. Note that this is a maximum, any points found to not have the check colour will abort any further checks so in most cases on a couple of points will actually be checked. Network and file based cameras are never checked.
V4L_MULTI_BUFFER — Использовать больше чем один буфер для Video 4 Linux устройств. Производительность при использовании Video 4 Linux устройств обычно лучшая если используются множественные буферы, разрешая следующему изображению быть захваченным в то время как предыдущее находится в обработке. Если у вас есть множественные устройства на карте, использующие один вход, который требует переключение, тогда этот метод может иногда вызывать ситуацию, когда кадры из одного источника смешиваются с кадрами из другого. Выключение этой опции предотвращает множественную буферизацию и результирует в в более медленный, но более стабильный захват изображений. Эта опция игнорируется для нелокальных камер или если только единственный вход представлен на базе чипе захвата. Эта опция относится к одной и той же проблеме, что и опция ZM_CAPTURES_PER_FRAME, и вы должны стандартно менять только одну из этих опций одновременно (Оставил по умолчанию — да);
Use more than one buffer for Video 4 Linux devices. Performance when using Video 4 Linux devices is usually best if multiple buffers are used allowing the next image to be captured while the previous one is being processed. If you have multiple devices on a card sharing one input that requires switching then this approach can sometimes cause frames from one source to be mixed up with frames from another. Switching this option off prevents multi buffering resulting in slower but more stable image capture. This option is ignored for non-local cameras or if only one input is present on a capture chip. This option addresses a similar problem to the ZM_CAPTURES_PER_FRAME option and you should normally change the value of only one of the options at a time.
CAPTURES_PER_FRAME — Насколько много изображений захвачено на возвращенный кадр для расшаренных локальных камер. Если вы исползуете камеры подсоединенные к плате видеозахвата, у которой 1 декодер обрабатывает несколько камер, то это может иногда создавать проблему изображения с наложенными кадрами в обратном порядке, из за чего получается плохое качество изображения и внешний вид дифференциального гребня критических точек. Увеличение данной опции позволяет вам увеличивать захваты дополнительных изображений до того, как какое-нибудь из них будет выбрано как захваченный кадр. Это позволяет устройству захвата «успокоиться» и воспроизводить картинку лучшего качества, жертвуя скоростью захвата. Эта опция не работает на сетевых камерах и платах видео захвата у которых несколько декодеров. Эта опция схожа с проблемой опции ZM_V4L_MULTI_BUFFER и вы должны в рядовых случаях менять только одну одну из них одновременно (Изменил на 2, так как возникли проблемы с «одночиповой» картой);
How many images are captured per returned frame, for shared local cameras. If you are using cameras attached to a video capture card which forces multiple inputs to share one capture chip, it can sometimes produce images with interlaced frames reversed resulting in poor image quality and a distinctive comb edge appearance. Increasing this setting allows you to force additional image captures before one is selected as the captured frame. This allows the capture hardware to ‘settle down’ and produce better quality images at the price of lesser capture rates. This option has no effect on (a) network cameras, or (b) where multiple inputs do not share a capture chip. This option addresses a similar problem to the ZM_V4L_MULTI_BUFFER option and you should normally change the value of only one of the options at a time.
FORCED_ALARM_SCORE — (Оставил по умолчанию 255);
Score to give forced alarms. The ‘zmu’ utility can be used to force an alarm on a monitor rather than rely on the motion detection algorithms. This option determines what score to give these alarms to distinguish them from regular ones. It must be 255 or less.
BULK_FRAME_INTERVAL — (Оставил по умолчанию 255);
How often a bulk frame should be written to the database. Traditionally ZoneMinder writes an entry into the Frames database table for each frame that is captured and saved. This works well in motion detection scenarios but when in a DVR situation (‘Record’ or ‘Mocord’ mode) this results in a huge number of frame writes and a lot of database and disk bandwidth for very little additional information. Setting this to a non-zero value will enabled ZoneMinder to group these non-alarm frames into one ‘bulk’ frame entry which saves a lot of bandwidth and space. The only disadvantage of this is that timing information for individual frames is lost but in constant frame rate situations this is usually not significant. This setting is ignored in Modect mode and individual frames are still written if an alarm occurs in Mocord mode also.
EVENT_CLOSE_MODE — Когда закрывать (заканчивать) непрерывное событие. Когда вы используете длительные режимы записи (Record или Mocord), события обычно закрываются (или заканчиваются) после определенного срока времени (установленной длины секции). Однако в режиме Mocord движение может быть зафиксировано в конце секции (наверное события). Этот параметр определяет что должно происходить в режиме Mocord. Настройка «По времени» (time) означает что событие будет закрыто в независимости от того, сработает ли тревога или нет. Настройка «Бездействия» (idle) означает что событие будет закрыто только в том случае, если не будет никакой тревоги. В случае появления тревоги событие будет продолжено. Настройка «По тревоге» (alarm) обозначает что событие будет закрыто после окончания тревоги в независимости от длины секции. Таким образом события могут быть короче чем длина секции (оставил по умолчанию idle);
When continuous events are closed. When a monitor is running in a continuous recording mode (Record or Mocord) events are usually closed after a fixed period of time (the section length). However in Mocord mode it is possible that motion detection may occur near the end of a section. This option controls what happens when an alarm occurs in Mocord mode. The ‘time’ setting means that the event will be closed at the end of the section regardless of alarm activity. The ‘idle’ setting means that the event will be closed at the end of the section if there is no alarm activity occuring at the time otherwise it will be closed once the alarm is over meaning the event may end up being longer than the normal section length. The ‘alarm’ setting means that if an alarm occurs during the event, the event will be closed once the alarm is over regardless of when this occurs. This has the effect of limiting the number of alarms to one per event and the events will be shorter than the section length if an alarm has occurred.
CREATE_ANALYSIS_IMAGES — (оставил по умолчанию — включено);
Create analysed alarm images with motion outlined. By default during an alarm ZoneMinder records both the raw captured image and one that has been analysed and had areas where motion was detected outlined. This can be very useful during zone configuration or in analysing why events occured. However it also incurs some overhead and in a stable system may no longer be necessary. This parameter allows you to switch the generation of these images off.
WEIGHTED_ALARM_CENTRES — Использовать взвешенный алгоритм расчета центра тревоги. ZM всегда вычисляет центральную точку тревоги в зоне, чтобы предоставить информацию о том, где на экране произошло движение. Это можно использовать как экспериментальный способ прослеживания движений или вашими расширениями. При сработанной тревоге или в режиме фильтра это простая середина между степенью обнаруженных пикселей. Данный метод хоть и точный, но создает нагрузку, поэтому по умолчанию отключен (оставил по умолчанию);
Use a weighted algorithm to calculate the centre of an alarm. ZoneMinder will always calculate the centre point of an alarm in a zone to give some indication of where on the screen it is. This can be used by the experimental motion tracking feature or your own custom extensions. In the alarmed or filtered pixels mode this is a simple midpoint between the extents of the detected pxiesl. However in the blob method this can instead be calculated using weighted pixel locations to give more accurate positioning for irregularly shaped blobs. This method, while more precise is also slower and so is turned off by default.
EVENT_IMAGE_DIGITS — Сколько цифр использовать для числового индекса кадров событий. Так как при записи событий кадры сохраняются в файловую систему, им присваивается свой числовой индекс. По умолчанию индексу дано 3 цифры, таким образом нумерация начинается с 001, 002, 003 и т.д. Это подходит для большинства сценариев, так как события более чем с 999 кадрами редко записываются. Однако если вы хотите записывать очень большие события, а так же используете стороннее ПО, то вы можете увеличить это значение, чтобы гарантировать правильную сортировку кадров. Но будьте осторожны, увеличение данного параметра на рабочей системе может сделать существующие события недоступными. Уменьшение данного параметра не создаст никаких побочных эффектов (оставил по умолчанию 3 символа);
How many significant digits are used in event image numbering. As event images are captured they are stored to the filesystem with a numerical index. By default this index has three digits so the numbers start 001, 002 etc. This works works for most scenarios as events with more than 999 frames are rarely captured. However if you have extremely long events and use external applications then you may wish to increase this to ensure correct sorting of images in listings etc. Warning, increasing this value on a live system may render existing events unviewable as the event will have been saved with the previous scheme. Decreasing this value should have no ill effects.
DEFAULT_ASPECT_RATIO — Формат изображений по умолчанию используемый на мониторах. Определяя размеры мониторов вы можете оставить отметку (checkbox) чтобы быть уверенным что соотношение ширины и высоты указаны верно. Если отметка (checkbox) не работает, то данная опция не имеет никакой силы. Данная настройка позволяет вам указать отношение ширины и высоты формата изображения (оставил по умолчанию 4:3);
The default width:height aspect ratio used in monitors. When specifying the dimensions of monitors you can click a checkbox to ensure that the width stays in the correct ratio to the height, or vice versa. This setting allows you to indicate what the ratio of these settings should be. This should be specified in the format <width value>:<height value> and the default of 4:3 normally be acceptable but 11:9 is another common setting. If the checkbox is not clicked when specifying monitor dimensions this setting has no effect.
USER_SELF_EDIT — Разрешать непривилегированным пользователям изменять детали своей учетной записи. Обычно только пользователи с системными полномочиями в состоянии изменять детали учетных записей других пользователей. Включение этой опции позволяет обычным пользователям изменять свои детали учетной записи, например пароль или язык (оставил по умолчанию отключенной);
Allow unprivileged users to change their details. Ordinarily only users with system edit privilege are able to change users details. Switching this option on allows ordinary users to change their passwords and their language settings
Вкладка пути (Paths):
DIR_EVENTS — путь к папке в которой необходимо сохранять события. В случае, если вы хотите записывать события на другой раздел, то вам необходимо создать ссылку с раздела на путь, который здесь будет указан (оставил по умолчанию);
Directory where events are stored. This is the path to the events directory where all the event images and other miscellaneous files are stored. It is normally given as a subdirectory of the web directory you have specified earlier however if disk space is tight it can reside on another partition in which case you should create a link from that area to the path you give here.
USE_DEEP_STORAGE — если вы планируете хранить большие архивы, то чтобы избежать лимит в 32К на UFS, либо используйте ZFS или включите данную опцию. Имейте в виду, то данная опция находится еще в стадии beta. (оставил по умолчанию);
Use a deep filesystem hierarchy for events. Traditionally ZoneMinder stores all event sfor a monitor in one directory for that monitor. This is simple and efficient except when you have very large amounts of events. Some filesystems are unable to store more than 32k files in one directory and even without this limitation, large numbers of files in a directory can slow creation and deletion of files. This option allows you to select a new method of storing events by year/month/day/hour/min/second which has the effect of separating events out into more directories, resulting in less per directory, and also making it easier to manually navigate to any events that may have happened at a particular time or date. Be warned: deep storage should be considered in beta for now, if you value your data do not select it.
DIR_IMAGES — Путь до директории с изображениями…. (оставил по умолчанию);
Directory where the images that the ZoneMinder client generates are stored. ZoneMinder generates a myriad of images, mosty of which are associated with events. For those that aren’t this is where they go.
DIR_SOUNDS — Путь до директории со звуками. ZM может воспроизводить звуки в случае срабатывания тревоги. Здесь вам нужно указать путь до данной директории (оставил по умолчанию);
Directory to the sounds that the ZoneMinder client can use. ZoneMinder can optionally play a sound file when an alarm is detected. This indicates where (relative to the web root) to look for this file.
PATH_ZMS — Путь до потокового сервера (zms). Потоковый сервер используется для отправки кадров в браузер. По умолчанию при установке указывается путь в директорию cgi-bin. Данный параметр указывает не локальный а web путь серверу. Как правило сервер работает в режиме parsed-header, но в случае возникновения проблем вы можете использовать его в режиме non-parsed-header (nph) указав путь nph-zms вместо zms (оставил по умолчанию);
Web path to zms streaming server. The ZoneMinder streaming server is required to send streamed images to your browser. It will be installed into the cgi-bin path given at configuration time. This option determines what the web path to the server is rather than the local path on your machine. Ordinarily the streaming server runs in parser-header mode however if you experience problems with streaming you can change this to non-parsed-header (nph) mode by changing ‘zms’ to ‘nph-zms’.
PATH_MAP — Путь до файлов отмеченных на карте памяти. ZM использует IPC для меж процессорного взаимодействия демонов. У этого есть свои плюсы и минусы. В этой версии ZM …(не до перевел, так как не понял смысл, оставил по умолчанию);
Path to the mapped memory files that that ZoneMinder can use. ZoneMinder has historically used IPC shared memory for shared data between processes. This has it’s advantages and limitations. This version of ZoneMinder can use an alternate method, mapped memory, instead with can be enabled with the —enable—mmap directive to configure. This requires less system configuration and is generally more flexible. However it requires each shared data segment to map onto a filesystem file. This option indicates where those mapped files go. You should ensure that this location has sufficient space for these files and for the best performance it should be a tmpfs file system or ramdisk otherwise disk access may render this method slower than the regular shared memory one.
PATH_SOCKS — Путь к .socks файлам. ZM обычно использует UNIX-sockets где это возможно. Это предотвращает внешние приложения от возможного ущерба демонов. Однако для каждого сокета должен быть создан .sock файл. В данном параметре как раз таки нужно указать путь, где необходимо создавать данный файл (оставил по умолчанию);
Path to the various Unix domain socket files that ZoneMinder uses. ZoneMinder generally uses Unix domain sockets where possible. This reduces the need for port assignments and prevents external applications from possibly compromising the daemons. However each Unix socket requires a .sock file to be created. This option indicates where those socket files go.
PATH_LOGS — Путь до лог-файлов, которые генерирует ZM. Существуют различные демоны, которые использует ZM для выполнения тех или иных задач. Большинство этих демонов генерирует лог файлы, которые нужно куда то сохранять. При ненадобности эти файлы можно удалить, если они не требуются для отладки (оставил по умолчанию);
Path to the various logs that the ZoneMinder daemons generate. There are various daemons that are used by ZoneMinder to perform various tasks. Most generate helpful log files and this is where they go. They can be deleted if not required for debugging.
PATH_SWAP — Путь до временных изображений, которые используются при потоковом воспроизведении. Буферизация воспроизведения требует временные файлы подкачки. Этот параметр определяет где эти файлы подкачки (точнее изображения) будут располагаться. Изображение будет храниться в данном каталоге до тех пор, пока это нужно, а после будут автоматически удаляться (оставил по умолчанию);
Path to location for temporary swap images used in streaming. Buffered playback requires temporary swap images to be stored for each instance of the streaming daemons. This option determines where these images will be stored. The images will actually be stored in sub directories beneath this location and will be automatically cleaned up after a period of time.
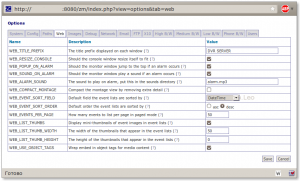
WEB_TITLE_PREFIX — Здесь вы можете указать название вашего DVR сервера. Удобно, если у вас несколько серверов (указал название своего сервера);
The title prefix displayed on each window. If you have more than one installation of ZoneMinder it can be helpful to display different titles for each one. Changing this option allows you to customise the window titles to include further information to aid identification.
WEB_RESIZE_CONSOLE — Должна ли консоль изменять размер окна при надобности. По умолчанию ZM сокращает размер окна, чтобы показать только существующие мониторы. Это сделано чтобы окно выглядело ненавязчивым, но возможно вам не удобны подобных размеров окна, тем более если окно открывается во вкладке браузера. Отключите данную опцию, чтобы размер окна не изменялся (изменил — нет);
Should the console window resize itself to fit. Traditionally the main ZoneMinder web console window has resized itself to shrink to a size small enough to list only the monitors that are actually present. This is intended to make the window more unobtrusize but may not be to everyones tastes, especially if opened in a tab in browsers which support this kind if layout. Switch this option off to have the console window size left to the users preference
WEB_POPUP_ON_ALARM — Поместить окно монитора по верх всех окон, в случае тревоги. При живом просмотре мониторов вы можете определить, хотите ли вы чтобы окно, которое могло быть свернуто, всплывало по верх всех окон, в случае если сработала тревога. Это может быть полезным, если например ваши мониторы просматривают ворота, окно может всплыть по верх окон, если кто то подъехал к воротам. (оставил по умолчанию — да);
Should the monitor window jump to the top if an alarm occurs. When viewing a live monitor stream you can specify whether you want the window to pop to the front if an alarm occurs when the window is minimised or behind another window. This is most useful if your monitors are over doors for example when they can pop up if someone comes to the doorway.
WEB_SOUND_ON_ALARM — Проигрывать звук в случае срабатывания сигнала тревоги. Вы можете указать, должно ли окно монитора воспроизводить сигнал в случае срабатывания тревоги (оставил по умолчанию — да);
Should the monitor window play a sound if an alarm occurs. When viewing a live monitor stream you can specify whether you want the window to play a sound to alert you if an alarm occurs.
WEB_ALARM_SOUND — название звукового файла сигнала тревог, который находится в директории указанной в параметре DIR_SOUNDS; (указал имя файла alarm.mp3, предварительно залив его в папку, путь которой указан в опции DIR_SOUNDS);
The sound to play on alarm, put this in the sounds directory. You can specify a sound file to play if an alarm occurs whilst you are watching a live monitor stream. So long as your browser understands the format it does not need to be any particular type. This file should be placed in the sounds directory defined earlier.
WEB_COMPACT_MONTAGE — Компактный скомпонованный режим просмотра, методом удаления дополнительных деталей. Скомпонованный режим просмотра показывает все активные мониторы в одном окне, включая небольшое меню, содержащее информацию о каждом мониторе. Это может генерировать дополнительный трафик и сделать размер окна больше чем нужно. Включив данную опцию можно удалить всэ дополнительную информацию (оставил по умолчанию — нет);
Compact the montage view by removing extra detail. The montage view shows the output of all of your active monitors in one window. This include a small menu and status information for each one. This can increase the web traffic and make the window larger than may be desired. Setting this option on removes all this extraneous information and just displays the images.
WEB_EVENT_SORT_FIELD — Сортировать события по определенному полю. События в списке могут быть отсортированы так как вам захочется. С помощью данной опции можно выбрать поле, по которому должны сортироваться события. Так же способ сортировки можно изменять нажатием по заголовку (оставил по умолчанию — DateTime);
Default field the event lists are sorted by. Events in lists can be initially ordered in any way you want. This option controls what field is used to sort them. You can modify this ordering from filters or by clicking on headings in the lists themselves. Bear in mind however that the ‘Prev’ and ‘Next’ links, when scrolling through events, relate to the ordering in the lists and so not always to time based ordering.
WEB_EVENT_SORT_ORDER — Сортировать события по определенному порядку. События в списке могут быть отсортированы так как вам захочется. Данная опция определяет, в каком порядка (по возрастанию или убыванию) сортировать события (изменил на desc);
Default order the event lists are sorted by. Events in lists can be initially ordered in any way you want. This option controls what order (ascending or descending) is used to sort them. You can modify this ordering from filters or by clicking on headings in the lists themselves. Bear in mind however that the ‘Prev’ and ‘Next’ links, when scrolling through events, relate to the ordering in the lists and so not always to time based ordering.
WEB_EVENTS_PER_PAGE — Количество событий отображаемых на одной странице. В списке событий вы можете получить список всех событий или только страницу. Данная опция позволяет указать сколько событий отображать на одной странице и сколько раз повторять заголовки при просмотре всех событий за раз (изменил на 50);
How many events to list per page in paged mode. In the event list view you can either list all events or just a page at a time. This option controls how many events are listed per page in paged mode and how often to repeat the column headers in non-paged mode.
WEB_LIST_THUMBS — Показывать эскиз событий в списке событий. По умолчанию в списке событий отображается только текст для экономии пространства и времени. С помощью данного параметра вы можете видеть небольшие эскизы каждого события, чтобы помочь вам выявить интересующие события. Размер данных эскизов вы можете изменить в следующих параметрах. (изменил на да);
Display mini-thumbnails of event images in event lists. Ordinarily the event lists just display text details of the events to save space and time. By switching this option on you can also display small thumbnails to help you identify events of interest. The size of these thumbnails is controlled by the following two options.
WEB_LIST_THUMB_WIDTH — Ширина эскиза события в списке событий. Этот параметр определяет ширину эскиза события в списке событий. Размер должен быть не большим, чтобы эскиз нормально вписывался в таблицу. При желании вы можете указать высоту в следующем параметре, но имейте в виду что задать вы можете или ширину или высоту. В случае ели у вас указана и ширина и высота использоваться будет только ширина (оставил по умолчанию);
The width of the thumbnails that appear in the event lists. This options controls the width of the thumbnail images that appear in the event lists. It should be fairly small to fit in with the rest of the table. If you prefer you can specify a height instead in the next option but you should only use one of the width or height and the other option should be set to zero. If both width and height are specified then width will be used and height ignored.
WEB_LIST_THUMB_HEIGHT — Высота эскиза события в списке событий. Этот параметр определяет высоту эскиза события в списке событий. Размер должен быть не большим, чтобы эскиз нормально вписывался в таблицу. При желании вы можете указать высоту в следующем параметре, но имейте в виду что задать вы можете или ширину или высоту. В случае ели у вас указана и ширина и высота использоваться будет только ширина (оставил по умолчанию);
The height of the thumbnails that appear in the event lists. This options controls the height of the thumbnail images that appear in the event lists. It should be fairly small to fit in with the rest of the table. If you prefer you can specify a width instead in the previous option but you should only use one of the width or height and the other option should be set to zero. If both width and height are specified then width will be used and height ignored.
WEB_USE_OBJECT_TAGS — (оставил по умолчанию);
Wrap embed in object tags for media content. There are two methods of including media content in web pages. The most common way is use the EMBED tag which is able to give some indication of the type of content. However this is not a standard part of HTML. The official method is to use OBJECT tags which are able to give more information allowing the correct media viewers etc to be loaded. However these are less widely supported and content may be specifically tailored to a particular platform or player. This option controls whether media content is enclosed in EMBED tags only or whether, where appropriate, it is additionally wrapped in OBJECT tags. Currently OBJECT tags are only used in a limited number of circumstances but they may become more widespread in the future. It is suggested that you leave this option on unless you encounter problems playing some content.
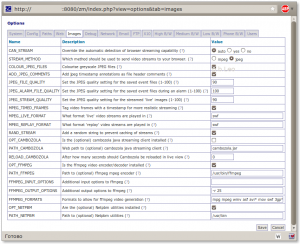
CAN_STREAM — Переопределение автоматически обнаруженного в браузере потока передачи. Если ваш браузер может обрабатывать потоки изображений ‘multipart/x-mixed-replace’, но ZM не понимает это, то вы можете использовать данную опцию, чтобы обеспечить поток без плагина Cambozola. Выбор параметра «Да» означает что ваш браузер может работать с потоками. Выбор параметра «Нет» обозначает что будут использоваться плагины. При выборе параметра «Авто» ZM решает сам (установил Auto);
Override the automatic detection of browser streaming capability. If you know that your browser can handle image streams of the type ‘multipart/x-mixed-replace’ but ZoneMinder does not detect this correctly you can set this option to ensure that the stream is delivered with or without the use of the Cambozola plugin. Selecting ‘yes’ will tell ZoneMinder that your browser can handle the streams natively, ‘no’ means that it can’t and so the plugin will be used while ‘auto’ lets ZoneMinder decide.
STREAM_METHOD — Метод передачи видео потока в браузер. ZM может передавать либо на mpeg видео, либо jpeg изображение. При выборе mpeg убедитесь, что в вашем браузере установлены необходимые плагины. При выборе jpeg без настроек у вас все будет работать на Mozilla или на Internet Explorer с установленным Java (выбрано jpeg);
Which method should be used to send video streams to your browser. ZoneMinder can be configured to use either mpeg encoded video or a series or still jpeg images when sending video streams. This option defines which is used. If you choose mpeg you should ensure that you have the appropriate plugins available on your browser whereas choosing jpeg will work natively on Mozilla and related browsers and with a Java applet on Internet Explorer
COLOUR_JPEG_FILES — Переводить ли цветные картинки в черно белые. С помощью данной опции весь отснятый материал цветной камеры можно перевести в черно белый. Плюс данной настройки в том, что можно экономить место на HDD (оставил по умолчанию);
Colourise greyscale JPEG files. Cameras that capture in greyscale can write their captured images to jpeg files with a corresponding greyscale colour space. This saves a small amount of disk space over colour ones. However some tools such as ffmpeg either fail to work with this colour space or have to convert it beforehand. Setting this option to yes uses up a little more space but makes creation of MPEG files much faster.
ADD_JPEG_COMMENTS — Добавить в заголовки jpeg файлов аннотации или комментарии. Jpeg файлы могут иметь ряд полей которые добавляются в заголовки файлов. В поле комментария может быть добавлен любой текст. При сохранении изображений событий в архив, данная опция поможет вам найти события с помощью стороннего программного обеспечения, которое умеет читать заголовки файлов jpeg (включил);
Add jpeg timestamp annotations as file header comments. JPEG files may have a number of extra fields added to the file header. The comment field may have any kind of text added. This options allows you to have the same text that is used to annotate the image additionally included as a file header comment. If you archive event images to other locations this may help you locate images for particular events or times if you use software that can read comment headers.
JPEG_FILE_QUALITY — Качество Jpeg файлов любых событий сохраняемых на HDD. При обнаружении событий ZM сохраняет файлы в формате jpeg, которые можно просматривать или переводить в видео поток. Чем выше цифра, тем качественнее будут сохраняться кадры, но при слабом интернет соединении просмотр изображений может занять много времени. Чем ниже цифра, тем быстрее вы сможете просматривать события, но качество оставит желать лучшего. Этот параметр относится ко всем файлам, которые пишутся на диск, за исключением тех событий, которые сработали по тревоги (оставил 90);
Set the JPEG quality setting for the saved event files (1-100). When ZoneMinder detects an event it will save the images associated with that event to files. These files are in the JPEG format and can be viewed or streamed later. This option specifies what image quality should be used to save these files. A higher number means better quality but less compression so will take up more disk space and take longer to view over a slow connection. By contrast a low number means smaller, quicker to view, files but at the price of lower quality images. This setting applies to all images written except if the capture image has caused an alarm and the alarm file quality option is set at a higher value when that is used instead.
JPEG_STREAM_QUALITY -Качество Jpeg файлов тревожных событий сохраняемых на HDD. Данная настройка равносильна параметру JPEG_FILE_QUALITY. Если значение меньше, чем основное, то оно игнорируется, чтобы важные события небыли испорчены. По умолчанию значение установлено на «0». Это означает что данная настройка попросту отключена и параметры качества задаются в настройке JPEG_FILE_QUALITY (оставил 100);
Set the JPEG quality setting for the saved event files during an alarm (1-100). This value is equivalent to the regular jpeg file quality setting above except that it only applies to images saved while in an alarm state and then only if this value is set to a higher quality setting than the ordinary file setting. If set to a lower value then it is ignored. Thus leaving it at the default of 0 effectively means to use the regular file quality setting for all saved images. This is to prevent acccidentally saving important images at a worse quality setting.
MPEG_TIMED_FRAMES — Помечать видео кадры меткой времени, для более реалистичного воспроизведения. При использовании MPEG метода в качестве базового, zm может передавать картинку двумя способами. Если данная опция включена, то каждый кадр взятый в момент захвата помечается меткой времени. Таким образом при изменении частоты кадров (при тревоге) поток будет поддерживаться в реальном времени. Если данная опция не включена, то частота кадра рассчитывается приблизительно. Данная опция рекомендуется в случае возникновения проблем с выбранным методом передачи видео (оставил по умолчанию);
Tag video frames with a timestamp for more realistic streaming. When using streamed MPEG based video, either for live monitor streams or events, ZoneMinder can send the streams in two ways. If this option is selected then the timestamp for each frame, taken from it’s capture time, is included in the stream. This means that where the frame rate varies, for instance around an alarm, the stream will still maintain it’s ‘real’ timing. If this option is not selected then an approximate frame rate is calculated and that is used to schedule frames instead. This option should be selected unless you encounter problems with your preferred streaming method.
MPEG_LIVE_FORMAT — В каком формате воспроизводить «живой» поток? При использовании MPEG метода ZM может воспроизводить видео в реальном времени. Но в зависимости от платформы можно выбрать формат воспроизведения. Данная опция позволяет выбрать видео формат посредством изменения расширения файла. По умолчанию формат ASF прекрасно работает в Windows платформе, с помощью Windows Media Player, но не факт что он будет работать на Linux платформе (оставил по умолчанию swf);
What format ‘live’ video streams are played in. When using MPEG mode ZoneMinder can output live video. However what formats are handled by the browser varies greatly between machines. This option allows you to specify a video format using a file extension format, so you would just enter the extension of the file type you would like and the rest is determined from that. The default of ‘asf’ works well under Windows with Windows Media Player but I’m currently not sure what, if anything, works on a Linux platform. If you find out please let me know! If this option is left blank then live streams will revert to being in motion jpeg format
MPEG_REPLAY_FORMAT —
What format ‘replay’ video streams are played in. When using MPEG mode ZoneMinder can replay events in encoded video format. However what formats are handled by the browser varies greatly between machines. This option allows you to specify a video format using a file extension format, so you would just enter the extension of the file type you would like and the rest is determined from that. The default of ‘asf’ works well under Windows with Windows Media Player and ‘mpg’, or ‘avi’ etc should work under Linux. If you knwo any more then please let me know! If this option is left blank then live streams will revert to being in motion jpeg format
RAND_STREAM —
Add a random string to prevent caching of streams. Some browsers can cache the streams used by ZoneMinder. In order to prevent his a harmless random string can be appended to the url to make each invocation of the stream appear unique.
OPT_CAMBOZOLA — Установлен ли java апплет на сервере. Cambozolla это удобный Java-апплет для ZM, который используется для просмотра потока изображений на браузерах, например internet explorer, которые изначально не корректно работают с данным форматом. Рекомендуется установить данный апплет, во избежания проблем при просмотре потока в IE.
Is the (optional) cambozola java streaming client installed. Cambozola is a handy low fat cheese flavoured Java applet that ZoneMinder uses to view image streams on browsers such as Internet Explorer that don’t natively support this format. If you use this browser it is highly recommended to install this from http://www.charliemouse.com/code/cambozola/ however if it is not installed still images at a lower refresh rate can still be viewed.
Немного о Cambozola …
Все же проблемы возникли, причем возникли с браузером Chromium, поэтому здесь я расскажу, что нужно сделать чтобы установить Cambozola:
Зайдем в директорию /usr/local/src:
$ cd /usr/local/src
Скачаем последнюю версию пакета:
$ sudo wget http://www.charliemouse.com/code/cambozola/cambozola-latest.tar.gz
Распакуем скачанный архив:
$ sudo tar xvfz cambozola-latest.tar.gz
Скопируем апплет в папку ZM:
$ sudo cp /usr/local/src/cambozola-0.92/dist/cambozola.jar /usr/share/zoneminder/
Ну а далее включаем эту установку, таким образом картинка будет корректно отображаться.
Продолжаем настройку …
PATH_CAMBOZOLA —
Web path to (optional) cambozola java streaming client. Cambozola is a handy low fat cheese flavoured Java applet that ZoneMinder uses to view image streams on browsers such as Internet Explorer that don’t natively support this format. If you use this browser it is highly recommended to install this from http://www.charliemouse.com/code/cambozola/ however if it is not installed still images at a lower refresh rate can still be viewed. Leave this as ‘cambozola.jar’ if cambozola is installed in the same directory as the ZoneMinder web client files.
RELOAD_CAMBOZOLA —
After how many seconds should Cambozola be reloaded in live view. Cambozola allows for the viewing of streaming MJPEG however it caches the entire stream into cache space on the computer, setting this to a number > 0 will cause it to automatically reload after that many seconds to avoid filling up a hard drive.
OPT_FFMPEG —
Is the ffmpeg video encoder/decoder installed. ZoneMinder can optionally encode a series of video images into an MPEG encoded movie file for viewing, downloading or storage. This option allows you to specify whether you have the ffmpeg tools installed. Note that creating MPEG files can be fairly CPU and disk intensive and is not a required option as events can still be reviewed as video streams without it.
PATH_FFMPEG —
Path to (optional) ffmpeg mpeg encoder. This path should point to where ffmpeg has been installed.
FFMPEG_INPUT_OPTIONS —
Additional input options to ffmpeg. Ffmpeg can take many options on the command line to control the quality of video produced. This option allows you to specify your own set that apply to the input to ffmpeg (options that are given before the -i option). Check the ffmpeg documentation for a full list of options which may be used here.
FFMPEG_OUTPUT_OPTIONS —
Additional output options to ffmpeg. Ffmpeg can take many options on the command line to control the quality of video produced. This option allows you to specify your own set that apply to the output from ffmpeg (options that are given after the -i option). Check the ffmpeg documentation for a full list of options which may be used here. The most common one will often be to force an output frame rate supported by the video encoder.
FFMPEG_FORMATS —
Formats to allow for ffmpeg video generation. Ffmpeg can generate video in many different formats. This option allows you to list the ones you want to be able to select. As new formats are supported by ffmpeg you can add them here and be able to use them immediately. Adding a ‘*’ after a format indicates that this will be the default format used for web video, adding ‘**’ defines the default format for phone video.
OPT_NETPBM —
Are the (optional) Netpbm utilities installed. For low bandwidth situations ZoneMinder will resize images into thumbnails on the fly before sending them to the browser to reduce the network traffic at the expense of CPU on the server. It uses the Netpbm package to do this and this option should be set to where the binaries from that package are installed. If you do not have it installed it means that the images will always be sent full size and rescaled on your browser which may or not be an issue for you.
PATH_NETPBM —
Path to (optional) Netpbm utilities. For low bandwidth situations ZoneMinder will resize images into thumbnails on the fly before sending them to the browser to reduce the network traffic at the expense of CPU on the server. It uses the Netpbm package to do this and this option should be set to where the binaries from that package are installed. If you do not have it installed it means that the images will always be sent full size and rescaled on your browser which may or not be an issue for you.
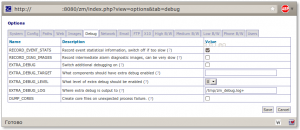
RECORD_EVENT_STATS — Записывать статистическую информацию событий. Отключите данную опцию, если ZM работает недостаточно быстро. Данная версия ZM умеет записывать подробную информацию о событиях, в таблицу Stats. Эта опция может помочь в тонкой настройке зон, несмотря на то что это сложно сделать. В будущих версиях настройка зон будет интуитивно понятной. По умолчанию опция включена (оставил по умолчанию);
Record event statistical information, switch off if too slow. This version of ZoneMinder records detailed information about events in the Stats table. This can help in profiling what the optimum settings are for Zones though this is tricky at present. However in future releases this will be done more easily and intuitively, especially with a large sample of events. The default option of ‘yes’ allows this information to be collected now in readiness for this but if you are concerned about performance you can switch this off in which case no Stats information will be saved.
RECORD_DIAG_IMAGES — Записывать промежуточные диагностические изображения. Дополнительно для записи статистической информации событий вы можете промежуточные диагностические изображения для отладки тревоги. Данный параметр по умолчанию отключен так как потребляет много ресурсов (оставил по умолчанию);
Record intermediate alarm diagnostic images, can be very slow. In addition to recording event statistics you can also record the intermediate diagnostic images that display the results of the various checks and processing that occur when trying to determine if an alarm event has taken place. There are several of these images generated for each frame and zone for each alarm or alert frame so this can have a massive impact on performance. Only switch this setting on for debug or analysis purposes and remember to switch it off again once no longer required.
EXTRA_DEBUG — Включить дополнительную отладку. У бинарных компонентов ZM есть несколько уровней вывода информации он отладке. Как правило значение бывает на низком уровне, дабы не забивать журналы слишком быстро. Опция заработает после перезапуска (оставил по умолчанию);
Switch additional debugging on. ZoneMinder binary components usually have several levels of debug information they can output. Normally this is set to a fairly low level to avoid filling logs too quickly. This options lets you switch on other options that allow you to configure additional debug information to be output. Components will pick up this instruction when they are restarted.
EXTRA_DEBUG_TARGET — Для каких компонентов включить дополнительную отладку. Если поле оставить пустым, то все компоненты будут работать в режиме отладки. Если в поле вписать опцию вида «_<компонент>» (ну например «_zmc»), то в debug режиме будет работать только указанный компонент. Если в поле вписать опцию вида «_<компонент>_<тождество>» (ну например «_zmc_m1»), то в debug режиме будет работать только указанный компонент (оставил по умолчанию);
What components should have extra debug enabled. There are three scopes of debug available. Leaving this option blank means that all components will use extra debug (not recommended). Setting this option to ‘_<component>’, e.g. _zmc, will limit extra debug to that component only. Setting this option to ‘_<component>_<identity>’, e.g. ‘_zmc_m1’ will limit extra debug to that instance of the component only. This is ordinarily what you probably want to do.
EXTRA_DEBUG_LEVEL — Выберите уровень отладки. существует 9 уровней отладки, самый высокий уровень — 9 и самый низкий уровень — 0. Но не все компоненты умеют работать со всеми уровнями. так же в случае высокого уровня отладки возможны проблемы с производительностью системы. Поэтому уровень отладки необходимо выставлять осторожнее (оставил по умолчанию);
What level of extra debug should be enabled. There are 9 levels of debug available, with higher numbers being more debug and level 0 being no debug. However not all levels are used by all components. Also if there is debug at a high level it is usually likely to be output at such a volume that it may obstruct normal operation. For this reason you should set the level carefully and cautiously until the degree of debug you wish to see is present.
EXTRA_DEBUG_LOG — Куда записывать логи отладки. В зависимости от вашей системы, вы можете найти информацию, предупреждения и ошибки в вашем системном логе. Этот параметр предоставляет вам возможность указать путь до отдельного лог-файла. Но если это простое имя файла, то возможно что несколько компонентов будут писать в один и тот же файл и при перезапуске служб будут удаляться данные из этого файла. чтобы избежать этого вам нужно в конце файла добавить символ «+», таким образом будет создаваться файл с pid-ом процесса, из чего следует, что у каждого компонента будет свой debug файл (оставил по умолчанию);
Where extra debug is output to. Depending on your system configuration you may find that only errors, warning and informational messages are logged to your system log. This option allows you to specify an additional target for these messages and debug. This also has the advantage of partitioning debug for the component you are tracing, from messages from other components. Be warned however that if this is a simple filename and you are debugging several components then they will all try and write to the same file with undesirable consequences. Appending a ‘+’ to the filename will cause the file to be created with a ‘.<pid>’ suffix containing your process id. In this way debug from each run of a component is kept separate. This is the recommended setting as it will also prevent subsequent runs from overwriting the same log.
DUMP_CORES — Создавать ключевые файлы в случае отказа процесса. В случае отказа процессов ZM детали данного сбоя записываются в лог, чтобы можно было проанализировать сбой. Но в некоторых случаях удобнее было бы диагностировать сбой, если бы создавался основной файл, в котором содержался бы дамп памяти этого процесса. Таим образом данный сбой был бы проанализирован в интерактивном режиме отладчиком, и можно было увидеть намного больше информации чем в системном журнале. Рекомендуется данную опцию использовать продвинутым пользователям (оставил по умолчанию);
Create core files on unexpected process failure. When an unrecoverable error occurs in a ZoneMinder binary process is has traditionally been trapped and the details written to logs to aid in remote analysis. However in some cases it is easier to diagnose the error if a core file, which is a memory dump of the process at the time of the error, is created. This can be interactively analysed in the debugger and may reveal more or better information than that available from the logs. This option is recommended for advanced users only otherwise leave at the default. Note using this option to trigger core files will mean that there will be no indication in the binary logs that a process has died, they will just stop, however the zmdc log will still contain an entry. Also note that you may have to explicitly enable core file creation on your system via the ‘ulimit -c’ command or other means otherwise no file will be created regardless of the value of this option.
HTTP_VERSION — Какую версию HTTP использовать ZM-у. ZM может взаимодействовать с сетевыми камерами с помощью стандарта HTTP/1.1 или HTTP/1.0 (оставил по умолчанию HTTP/1.1);
The version of HTTP that ZoneMinder will use to connect. ZoneMinder can communicate with network cameras using either of the HTTP/1.1 or HTTP/1.0 standard. A server will normally fall back to the version it supports iwht no problem so this should usually by left at the default. However it can be changed to HTTP/1.0 if necessary to resolve particular issues.
HTTP_UA — Агент ZM для своей идентификации. При подключении к удаленным камерам ZM идентифицирует себя по данному параметру и версии. Обычно это достаточно. Но если вам ппалась камера, которая может общаться только с определенной версией браузера, вы можете изменить эту строчку на другое значение, например Internet Explorer или Netscape и т.д. (оставил по умолчанию, так как сетевых камер я не использую);
The user agent that ZoneMinder uses to identify itself. When ZoneMinder communicates with remote cameras it will identify itself using this string and it’s version number. This is normally sufficient, however if a particular cameras expects only to communicate with certain browsers then this can be changed to a different string identifying ZoneMinder as Internet Explorer or Netscape etc.
HTTP_TIMEOUT — Как долго ZM ждать изображение от сетевой камеры. Данный параметр указывает, тайм аут в миллисекундах ожидания потока от сетевой камеры (оставил по умолчанию, так как сетевых камер я не использую);
How long ZoneMinder waits before giving up on images (milliseconds). When retrieving remote images ZoneMinder will wait for this length of time before deciding that an image is not going to arrive and taking steps to retry. This timeout is in milliseconds (1000 per second) and will apply to each part of an image if it is not sent in one whole chunk.
MIN_RTP_PORT — Порт, который слушает ZM для трафика RTP от. При использовании ZM — ом сетевой камеры с потоком MPEG4 передающимся RTP протоколом Unicast методом, необходимо указать порты для камеры, которая будет контролировать передачу данных (я вроде понял это так…). Обычно 2 соседних порта используются для каждой камеры, причем один для управления пакетами, а другой для пакетов данных. Данный порт должен быть четным числом, так же не забудьте проверить настройки firewall (оставил по умолчанию, так как сетевых камер я не использую);
Minimum port that ZoneMinder will listen for RTP traffic on. When ZoneMinder communicates with MPEG4 capable cameras using RTP with the unicast method it must open ports for the camera to connect back to for control and streaming purposes. This setting specifies the minimum port number that ZoneMinder will use. Ordinarily two adjacent ports are used for each camera, one for control packets and one for data packets. This port should be set to an even number, you may also need to open up a hole in your firewall to allow cameras to connect back if you wish to use unicasting.
MAX_RTP_PORT — Порт, который слушает ZM для трафика RTP до. При использовании ZM — ом сетевой камеры с потоком MPEG4 передающимся RTP протоколом Unicast методом, необходимо указать порты для камеры, которая будет контролировать передачу данных (я вроде понял это так…). Обычно 2 соседних порта используются для каждой камеры, причем один для управления пакетами, а другой для пакетов данных. Данный порт должен быть четным числом, так же не забудьте проверить настройки firewall (оставил по умолчанию, так как сетевых камер я не использую);
Maximum port that ZoneMinder will listen for RTP traffic on. When ZoneMinder communicates with MPEG4 capable cameras using RTP with the unicast method it must open ports for the camera to connect back to for control and streaming purposes. This setting specifies the maximum port number that ZoneMinder will use. Ordinarily two adjacent ports are used for each camera, one for control packets and one for data packets. This port should be set to an even number, you may also need to open up a hole in your firewall to allow cameras to connect back if you wish to use unicasting. You should also ensure that you have opened up at least two ports for each monitor that will be connecting to unicasting network cameras.
OPT_EMAIL — Должен ли ZM отправлять по электронной почте детали событий, которые соответствуют подходящему фильтру. В ZM можно создать фильтры которые могут определить нужно ли при определеных критериях событий отправлять оповещение по электронной почте. С помощью данной функции вы будете получать информацию о том или ином событии. Данная опция включает или отключает эту функцию. Письма отправляемые zm после включения данной опции корректно читаются только в почтовых клиентах (поставил галочку);
Should ZoneMinder email you details of events that match corresponding filters. In ZoneMinder you can create event filters that specify whether events that match certain criteria should have their details emailed to you at a designated email address. This will allow you to be notified of events as soon as they occur and also to quickly view the events directly. This option specifies whether this functionality should be available. The email created with this option can be any size and is intended to be sent to a regular email reader rather than a mobile device.
EMAIL_ADDRESS — Адрес электронной почты, куда необходимо отправлять оповещения. В Данном поле вам необходимо указать адрес, куда необходимо отправлять оповещения событиях (тут я заполнил свой почтовый адрес);
The email address to send matching event details to. This option is used to define the email address that any events that match the appropriate filters will be sent to.
EMAIL_SUBJECT — Здесь нужно указать тему письма, которое будет оправлено в случае тревоги. (%MN% — показывает название монитора, %EI% — показывает id события, %ESM% — показывает… ,%ESA% — показывает… , %EFA% — показывает… ). Данный параметр можно заполнить по своему вкусу, например:
ZM: Сработала сигнализация - %MN%-%EI% (%ESM% - %ESA% %EFA%)
The subject of the email used to send matching event details. This option is used to define the subject of the email that is sent for any events that match the appropriate filters.
EMAIL_BODY — Текст сообщения, которое отсылается пользователю. (%EL% — показывает продолжительность события, %EF% — показывает …, %EST% — показывает …, %EPS% — показывает … ). Данный параметр можно записать по своему вкусу. Я написал ее так:
Доброго времени суток хозяин!
ZM обнаружил какую-то движуху на мониторе %MN%.
Подробная информация:
  Монитор: %MN%
  ID события: %EI%
  Продолжительность: %EL%
  Кадры: %EF% (%EFA%)
  Результаты: t%EST% m%ESM% a%ESA%
Данная тревога сработала из за фильтра %FN%. Посмотреть ее можно тут - %EPS%
---
DVR SERVER
The body of the email used to send matching event details. This option is used to define the content of the email that is sent for any events that match the appropriate filters.
OPT_MESSAGE — Должен ли ZM отправлять отправлять короткие сообщения с информацией о событиях, которые соответствуют подходящему фильтру. В ZM можно создать фильтры которые могут определить нужно ли при определеных критериях событий отправлять сообщения. С помощью данной функции вы будете получать информацию о том или ином событии. Данная опция включает или отключает эту функцию. Сообщения отправляемые zm при включенной данной опции будут короткими, так как предполагают использование SMS шлюза, для получения информации на телефон (шлюза у меня нет, поэтому галочку я не ставил);
Should ZoneMinder message you with details of events that match corresponding filters. In ZoneMinder you can create event filters that specify whether events that match certain criteria should have their details sent to you at a designated short message email address. This will allow you to be notified of events as soon as they occur. This option specifies whether this functionality should be available. The email created by this option will be brief and is intended to be sent to an SMS gateway or a minimal mail reader such as a mobile device or phone rather than a regular email reader.
MESSAGE_ADDRESS — Адрес электронной почты, куда необходимо отправлять сообщения. В Данном поле вам необходимо указать адрес, куда необходимо отправлять короткие сообщения о событиях. (оставил пустым, так как не нужно);
The email address to send matching event details to.This option is used to define the short message email address that any events that match the appropriate filters will be sent to.
MESSAGE_SUBJECT — Здесь нужно указать тему письма, которое будет оправлено в случае тревоги (тут я все оставил по умолчанию);
The subject of the message used to send matching event details. This option is used to define the subject of the message that is sent for any events that match the appropriate filters.
MESSAGE_BODY — Само сообщение которое будет отправлено в случае тревоги, если она соответствует фильтру (оставил так как было);
The body of the message used to send matching event details. This option is used to define the content of the message that is sent for any events that match the appropriate filters.
NEW_MAIL_MODULES — Использовать обновленный модуль отправки сообщений. По умолчанию ZM использует модуль MIME:: Entity Perl для отправки сообщений на электронную почту. Но некоторым пользователем этот модуль кажется недостаточно гибким, и так же были с ним возможны проблемы. Если у вас возникают подобного рода проблемы, попробуйте воспользоваться более новым методом (MIME:: Lite и Net:: SMTP). Этот метод был внесен Ross Melin, поддерживает SMTP и должен работать без проблем. Но так как данный метод недостаточно протестирован — по умолчанию он выключен (оставил по умолчанию);
Use a newer perl method to send emails. Traditionally ZoneMinder has used the MIME::Entity perl module to construct and send notification emails and messages. Some people have reported problems with this module not being present at all or flexible enough for their needs. If you are one of those people this option allows you to select a new mailing method using MIME::Lite and Net::SMTP instead. This method was contributed by Ross Melin and should work for everyone but has not been extensively tested so currently is not selected by default.
EMAIL_HOST — Адрес SMTP сервера. Если вы выбрали SMTP метод отправки сообщений, то вам необходимо тут указать адрес SMTP сервера. По умолчанию здесь указана опция localhost, поэтому если у вас установлен sendmail, exim или аналогичный сервер, то сообщения будут доставляться. Но так же есть возможность указать smtp адрес вашего провайдера (оставил по умолчанию localhost);
The host address of your SMTP mail server. If you have chosen SMTP as the method by which to send notification emails or messages then this option allows you to choose which SMTP server to use to send them. The default of localhost may work if you have the sendmail, exim or a similar daemon running however you may wish to enter your ISP’s SMTP mail server here.
FROM_EMAIL — От какова адреса будут отправляться сообщения на электронную почту. Данная опция удобна, если вы хотите фильтровать сообщения на вашем почтовом ящике. В адрес можно указать что-то вроде [email protected] (указал желаемый адрес, хотя тоже нафиг не нужно);
The email address you wish your event notifications to originate from. The emails or messages that will be sent to you informing you of events can appear to come from a designated email address to help you with mail filtering etc. An address of something like [email protected] is recommended.
URL — URL адрес до ZM. отправляемые сообщения могут содержать ссылки на те или иные события. Для того, чтобы это корректно работало, необходимо указать адрес, например http://host.your.domain/zm.php. (в нашем случае я указал http://my-ip:8080/zm);
The URL of your ZoneMinder installation. The emails or messages that will be sent to you informing you of events can include a link to the events themselves for easy viewing. If you intend to use this feature then set this option to the url of your installation as it would appear from where you read your email, e.g. http://host.your.domain/zm.php.
OPT_UPLOAD — Должен ли ZM загружать события по FTP. В ZM можно создать фильтр, в правилах которого можно включить загрузку событий по FTP;
Should ZoneMinder support uploading events from filters. In ZoneMinder you can create event filters that specify whether events that match certain criteria should be uploaded to a remote server for archiving. This option specifies whether this functionality should be available
UPLOAD_ARCH_FORMAT — В каком формате должны загружаться события на FTP сервер. Загружаемые события могут быть сохранены в формате tar или zip. С помощью данной опции можно выбрать, в каком формате загружать события. Имейте в виду, что для корректной работы данного модуля необходимо установить PERL модуль Archive::Tar и Archive::Zip;
What format the uploaded events should be created in. Uploaded events may be stored in either .tar or .zip format, this option specifies which. Note that to use this you will need to have the Archive::Tar and/or Archive::Zip perl modules installed.
UPLOAD_ARCH_COMPRESS — Сжимать за архивированные файлы. При создании архивов, файлы могут сжиматься. Данная опция полезна, если у FTP сервера ограниченно место на HDD;
Should archive files be compressed. When the archive files are created they can be compressed. However in general since the images are compressed already this saves only a minimal amount of space versus utilising more CPU in their creation. Only enable if you have CPU to waste and are limited in disk space on your remote server or bandwidth.
UPLOAD_ARCH_ANALYSE — Включать аналитические файлы в архив;
Include the analysis files in the archive. When the archive files are created they can contain either just the captured frames or both the captured frames and, for frames that caused an alarm, the analysed image with the changed area highlighted. This option controls files are included. Only include analysed frames if you have a high bandwidth connection to the remote server or if you need help in figuring out what caused an alarm in the first place as archives with these files in can be considerably larger.
UPLOAD_FTP_HOST — адрес удаленного сервера для загрузки файлов;
The remote server to upload to. This is the remote machine that you wish to upload archived events to.
UPLOAD_FTP_USER — имя пользователя для доступа к FTP серверу;
Your ftp username. You can use filters to instruct ZoneMinder to upload events to a remote ftp server. This option indicates the username that ZoneMinder should use to log in for ftp transfer.
UPLOAD_FTP_PASS — пароль пользователя для доступа к FTP серверу;
Your ftp password. You can use filters to instruct ZoneMinder to upload events to a remote ftp server. This option indicates the password that ZoneMinder should use to log in for ftp transfer.
UPLOAD_FTP_LOC_DIR — временная локальная директория на сервере, которая используется для загрузки файлов. После загрузки, файлы, которые будут в данном каталоге будут удалены;
The local directory in which to create upload files. You can use filters to instruct ZoneMinder to upload events to a remote ftp server. This option indicates the local directory that ZoneMinder should use for temporary upload files. These are files that are created from events, uploaded and then deleted.
UPLOAD_FTP_REM_DIR — удаленный каталог на FTP сервере, где необходимо сохранять файлы;
The remote directory to upload to. You can use filters to instruct ZoneMinder to upload events to a remote ftp server. This option indicates the remote directory that ZoneMinder should use to upload event files to.
UPLOAD_FTP_TIMEOUT — Максимальный тайм-аут для неактивных протоколов передачи файлов (в секундах);
How long to allow the transfer to take for each file. You can use filters to instruct ZoneMinder to upload events to a remote ftp server. This option indicates the maximum ftp inactivity timeout (in seconds) that should be tolerated before ZoneMinder determiesn that the transfer has failed and closes down the connection.
UPLOAD_FTP_PASSIVE — Использовать passive режим передачи файлов. Можно включить, если ваш сервер находится за маршрутизатором с брандмауэром или прокси сервером;
Use passive ftp when uploading. If your computer is behind a firewall or proxy you may need to set FTP to passive mode. In fact for simple transfers it makes little sense to do otherwise anyway but you can set this to ‘No’ if you wish.
UPLOAD_FTP_DEBUG — Включить режим отладки для FTP. Можно включить, если вы наблюдаете проблемы при загрузке файлов;
Switch ftp debugging on. You can use filters to instruct ZoneMinder to upload events to a remote ftp server. If you are having (or expecting) troubles with uploading events then setting this to ‘yes’ permits additional information to be included in the zmfilter log file.
OPT_X10 — Включить поддержку ZM устройств X10 «Умный дом»;
Support interfacing with X10 devices. If you have an X10 Home Automation setup in your home you can use ZoneMinder to initiate or react to X10 signals if your computer has the appropriate interface controller. This option indicates whether X10 options will be available in the browser client.
X10_DEVICE — Путь до порта к которому подключен контроллер X10. По умолчанию тут указан /dev/ttyS0 (Последовательный или COM-1 порт);
What device is your X10 controller connected on. If you have an X10 controller device (e.g. XM10U) connected to your computer this option details which port it is conected on, the default of /dev/ttyS0 maps to serial or com port 1.
X10_HOUSE_CODE — Какой код используется в X10 устройстве. (Буква от A до P);
What X10 house code should be used. X10 devices are grouped together by identifying them as all belonging to one House Code. This option details what that is. It should be a single letter between A and P.
X10_DB_RELOAD_INTERVAL — Как часто демон X10 перезагружает данные монитора из базы данных (в секундах);
How often (in seconds) the X10 daemon reloads the monitors from the database. The zmx10 daemon periodically checks the database to find out what X10 events trigger, or result from, alarms. This option determines how frequently this check occurs, unless you change this area frequently this can be a fairly large value.
High B/W (Высокая пропускная способность интернет соединения.
Параметр начинается на WEB_H_…),
Medium B/W(Средняя пропускная способность интернет соединения.
Параметр начинается на WEB_M_…),
Low B/W(Низкая пропускная способность интернет соединения.
Параметр начинается на WEB_L_…).
WEB_…_REFRESH_MAIN — Как часто (в секундах) обновлять главную страницу консоли;
How often (in seconds) the main console window should refresh itself. The main console window lists a general status and the event totals for all monitors. This is not a trivial task and should not be repeated too frequently or it may affect the performance of the rest of the system.
WEB_…_REFRESH_CYCLE — С каким интервалом (в секундах) менять монитор при циклическом просмотре мониторов;
How often (in seconds) the cycle watch window swaps to the next monitor. The cycle watch window is a method of continuously cycling between images from all of your monitors. This option determines how often to refresh with a new image.
WEB_…_REFRESH_IMAGE — С каким интервалом (в секундах) обновлять изображение при отключенном режиме передачи потока;
How often (in seconds) the watched image is refreshed (if not streaming). The live images from a monitor can be viewed in either streamed or stills mode. This option determines how often a stills image is refreshed, it has no effect if streaming is selected.
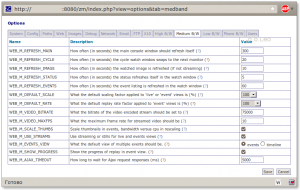 WEB_…_REFRESH_STATUS — Как часто (в секундах) обновлять состояние области с часами при просмотре монитора;
How often (in seconds) the status refreshes itself in the watch window. The monitor window is actually made from several frames. The one in the middle merely contains a monitor status which needs to refresh fairly frequently to give a true indication. This option determines that frequency.
WEB_…_REFRESH_EVENTS — Как часто (в секундах) обновлять состояние области с событиями при просмотре монитора;
How often (in seconds) the event listing is refreshed in the watch window. The monitor window is actually made from several frames. The lower framme contains a listing of the last few events for easy access. This option determines how often this is refreshed.
WEB_…_DEFAULT_SCALE — Какой масштаб картинки применяется к монитору или просмотру событий. Значение 100% — нормальный размер;
What the default scaling factor applied to ‘live’ or ‘event’ views is (%). Normally ZoneMinder will display ‘live’ or ‘event’ streams in their native size. However if you have monitors with large dimensions or a slow link you may prefer to reduce this size, alternatively for small monitors you can enlarge it. This options lets you specify what the default scaling factor will be. It is expressed as a percentage so 100 is normal size, 200 is double size etc.
WEB_…_DEFAULT_RATE — Скорость воспроизведения событий. Значение 100% — нормальная скорость;
What the default replay rate factor applied to ‘event’ views is (%). Normally ZoneMinder will display ‘event’ streams at their native rate, i.e. as close to real-time as possible. However if you have long events it is often convenient to replay them at a faster rate for review. This option lets you specify what the default replay rate will be. It is expressed as a percentage so 100 is normal rate, 200 is double speed etc.
WEB_…_VIDEO_BITRATE — Максимальный Битрейт, который будет использоваться для видео потока;
What the bitrate of the video encoded stream should be set to. When encoding real video via the ffmpeg library a bit rate can be specified which roughly corresponds to the available bandwidth used for the stream. This setting effectively corresponds to a ‘quality’ setting for the video. A low value will result in a blocky image whereas a high value will produce a clearer view. Note that this setting does not control the frame rate of the video however the quality of the video produced is affected both by this setting and the frame rate that the video is produced at. A higher frame rate at a particular bit rate result in individual frames being at a lower quality.
WEB_…_VIDEO_MAXFPS — Максимальная частота кадров, которая будет использоваться для видео потока;
What the maximum frame rate for streamed video should be. When using streamed video the main control is the bitrate which determines how much data can be transmitted. However a lower bitrate at high frame rates results in a lower quality image. This option allows you to limit the maximum frame rate to ensure that video quality is maintained. An additional advantage is that encoding video at high frame rates is a processor intensive task when for the most part a very high frame rate offers little perceptible improvement over one that has a more manageable resource requirement. Note, this option is implemented as a cap beyond which binary reduction takes place. So if you have a device capturing at 15fps and set this option to 10fps then the video is not produced at 10fps, but rather at 7.5fps (15 divided by 2) as the final frame rate must be the original divided by a power of 2.
WEB_…_SCALE_THUMBS — Создавать превью изображений событий;
Scale thumbnails in events, bandwidth versus cpu in rescaling. If unset, this option sends the whole image to the browser which resizes it in the window. If set the image is scaled down on the server before sending a reduced size image to the browser to conserve bandwidth at the cost of cpu on the server
WEB_…_USE_STREAMS — Использовать потоковую передачу для просмотра событий;
Use streaming or stills for live and events views. Both the live and events views can use streaming to deliver a smoother feed. However over slow connections or in some other circumstances you can prefer to view stills instead. You can configure this globally with ZM_CAN_STREAM but this option allows you to modify your preference based on the bandwidth setting. Note that this option does not prevent you switching to streaming mode but just selects what the initial default setting is.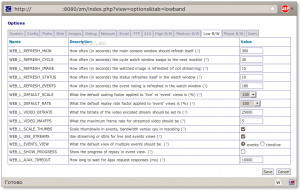
WEB_…_EVENTS_VIEW — Как по умолчанию предоставлять несколько событий;
What the default view of multiple events should be. Stored events can be viewed in either an events list format or in a timeline based one. This option sets the default view that will be used. Choosing one view here does not prevent the other view being used as it will always be selectable from whichever view is currently being used.
WEB_…_SHOW_PROGRESS — Показывать линию процесса при просмотре событий;
Show the progress of replay in event view. When viewing events an event navigation panel and progress bar is shown below the event itself. This allows you to jump to specific points in the event, but can can also dynamically update to display the current progress of the event replay itself. This progress is calculated from the actual event duration and is not directly linked to the replay itself, so on limited bandwidth connections may be out of step with the replay. This option allows you to turn off the progress display, whilst still keeping the navigation aspect, where bandwidth prevents it functioning effectively.
WEB_…_AJAX_TIMEOUT — Время ожидания Ajax запросов.
How long to wait for Ajax request responses (ms). The newer versions of the live feed and event views use Ajax to request information from the server and populate the views dynamically. This option allows you to specify a timeout if required after which requests are abandoned. A timeout may be necessary if requests would overwise hang such as on a slow connection. This would tend to consume a lot of browser memory and make the interface unresponsive. Ordinarily no requests should timeout so this setting should be set to a value greater than the slowest expected response. This value is in milliseconds but if set to zero then no timeout will be used.
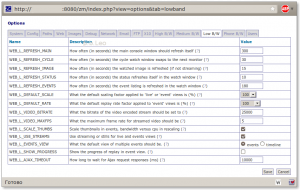 Вкладка Phone B/W (Очень низкая пропускная способность интернет соединения).
WEB_P_DEFAULT_RATE — Скорость воспроизведения событий. Значение 100% — нормальная скорость;
What the default replay rate factor applied to ‘event’ views is (%). Normally ZoneMinder will display ‘event’ streams at their native rate, i.e. as close to real-time as possible. However if you have long events it is often convenient to replay them at a faster rate for review. This option lets you specify what the default replay rate will be. It is expressed as a percentage so 100 is normal rate, 200 is double speed etc.
WEB_P_SCALE_THUMBS — Создавать превью изображений событий;
Scale thumbnails in events, bandwidth versus cpu in rescaling. If unset, this option sends the whole image to the browser which resizes it in the window. If set the image is scaled down on the server before sending a reduced size image to the browser to conserve bandwidth at the cost of cpu on the server
WEB_P_AJAX_TIMEOUT — Время ожидания Ajax запросов.
How long to wait for Ajax request responses (ms). The newer versions of the live feed and event views use Ajax to request information from the server and populate the views dynamically. This option allows you to specify a timeout if required after which requests are abandoned. A timeout may be necessary if requests would overwise hang such as on a slow connection. This would tend to consume a lot of browser memory and make the interface unresponsive. Ordinarily no requests should timeout so this setting should be set to a value greater than the slowest expected response. This value is in milliseconds but if set to zero then no timeout will be used.
Вкладка Users. (Пользователи).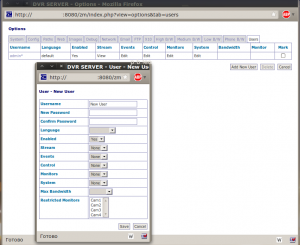
При просмотре данной вкладке вы увидите только таблицу пользователей и привилегии, которые им разрешены. Здесь я рассмотрю все настройки:
Поле UserName — туда нужно набрать желаемое имя пользователя; NewPassword — набираем желаемый пароль для данного пользователя, Confirm Password — повторяем пароль; Language — определённому пользователю можно назначить свою локализацию консоли, если значение пустое то используется локализация по умолчанию; Enabled — включить этого пользователя или нет; Stream — может ли пользователь просматривать мониторы; Events — что может делать данный пользователь с событиями, где none — ничего, view — только просматривать, edit — просматривать и редактировать; Control — где none — ничего, view — только просматривать, edit — просматривать и редактировать; Monitors — что может делать пользователь с мониторами, где none — ничего, view — только просматривать, edit — просматривать и редактировать; System — что может делать пользователь с системными настройками, где none — ничего, view — только просматривать, edit — просматривать и редактировать; MaxBandwidth — максимальная пропускная способность канала для данного пользователя; Restricted Monitors — Здесь можно ограничить пользователя определенным мониторам (удерживайте клавишу ctrl, чтобы выбрать несколько мониторов).
Производим основные настройки по своему вкусу. Что смог перевести — перевел. То что НЕ переведено — будет переведено со временем, так же имейте в виду что английский язык я знаю плохо, поэтому если что не так — пишите…
5. Добавляем камеру.
Здесь я так же распишу все параметры которые там есть, но для начала жмем кнопку Add Monitor и видим вкладку General, где :
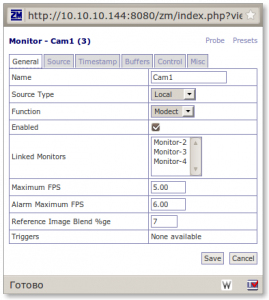
Name — Указываем имя монитора;
Sours type — указываем тип источника (локальный, удаленный, файл, ffmpeg);
Function — функция монитора, где none — не использовать, Monitor — только просматривать;
Enabled — с помощью данной опции мы можем включить или выключить монитор;
Linked Monitors — с помощью данной опции мы можем связать мониторы;
Max FPS — Здесь мы можем указать максимальное количество кадров в секунду;
Alarm Max FPS — Максимальное количество кадров в секунду для тревоги.
Reference Image Blend %ge — Прозрачность опорного кадра, в %;
Triggers — пока не знаю что это …
Далее переходим во вкладку Source, где видим следующие настройки: 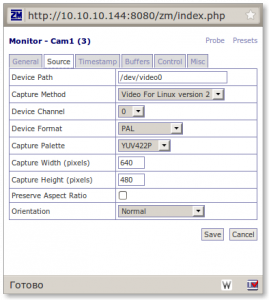
Device Path — путь до видео устройства (как правило это /dev/video0, хотя если устройств несколько, то может быть /dev/video1 например);
Capture Method — Метод захвата видео потока (предпочтительно Video For Linux v.2);
Device Channel — Канал видео устройства(Камера у меня подключена к выводу Video0 => канал 0);
Device Format — Формат камеры (Поставил Pal);
Capture Palette — режим захвата (Поставил YUV422P);
Capture Width (pixels) — Ширина изображения (640);
Capture Height (pixels) — Высота изображения (480);
Preserve Aspect Ratio — Сохранять пропорции (Здесь ставим галочку);
Orientation — Ориентация картинки (Оставил нормальную).
Переходим во вкладку Timestamp (Метка времени), и видим следующие настройки:
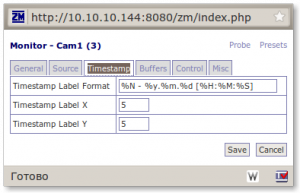
Timestamp Lable Format — Формат вывода даты и времени на изображении, где:
%N — имя монитора, %y — Год, %m — Месяц, %d — День, %H — Часы, %M — Минуты, %S — Секунды.
(Для себя я выставил все таким образом: %N — %y.%m.%d [%H:%M:%S]
Timestamp Lable X — Положение метки по оси X (Оставил по умолчанию);
Timestamp Lable Y — Положение метки по оси Y (Оставил по умолчанию).
Теперь переходим во вкладку Buffers (Буферы) и видим следующее :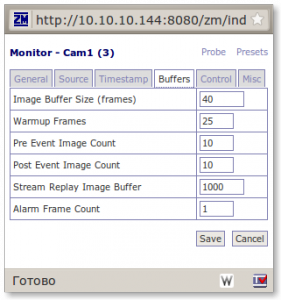
(Данную вкладку я особо расписывать не буду, так же возможна немного ошибочная расшифровка параметров, так как смысл некоторых я так и не понял, все значения я оставил по умолчанию)
Image Buffer Size (frames) — Размер буфера изображения (в кадрах);
Warmup Frames — WTF?!;
Pre Event Image Count — Буфер изображения до события;
Post Event Image Count — Буфер изображения после событий;
Stream Replay Image Buffer — Буфер воспроизведения потока изображения;
Alarm Frame Count — счетчик кадра тревоги.
Далее, если в настройках у нас включена поддержка управляемых камер (параметр OPT_CONTROL), то здесь мы увидим данную вкладку:
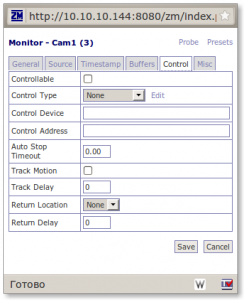 (p.s.: Управляемой камеры у меня нет, но настройки я распишу, чтобы было как справочное пособие …)
Controllable — Включить область с инструментами контроля камеры;
Control Type — Тип управления, так же там есть ссылка «Edit» (Редактировать), куда можно добавить другие параметры типа управления: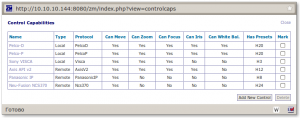
Control Device — Здесь указываем устройство контроля;
Control Adress —
Auto Stop Timeout —
Track Delay —
Return Location —
Return Delay —
Осталась вкладка Misc (прочее), где есть следующие параметры: 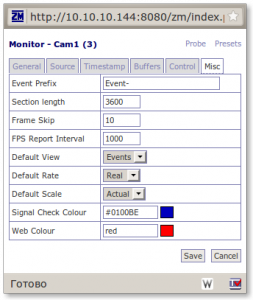
Event Prefix — Префикс имени события;
Section length — Длина секции (в кадрах);
Frame Skip —
FSP Report Interval —
Default View —
Default Rate —
Default Scale —
Signal Check Colour —
Web Colour —
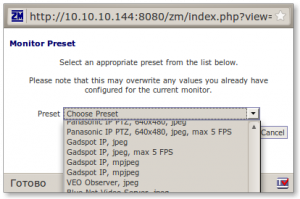 Так же есть еще ссылка Presents, где возможно выбрать пред установку камер, но будьте осторожны, все настройки, которые вы проводили ранее, будут удалены, и проверьте путь к устройству.
Если все сделано правильно, а так же правильно подключена камера к монитору — то вы уже можете увидеть картинку!
6.Режимы записи
ZM умеет работать в нескольких режимах, а именно:
- Monitor — обычный мониторинг;
- Modect — обнаружение движения;
- Record — непрерывная запись;
- Mocord — запись при обнаружении движения;
- Nodect — без реакции на движение.
В моем случае подходящий режим работы будет Motion, так как мне нужна запись только в случае появления тех или иных личностей. Поэтому га главной странице консоли изменяем функцию интересующих нас мониторов с «Monitor» на «Motion».
Так же при желании можно настроить зоны, которые нас интересуют.
7.Проблема с автозагрузкой.
После перезагрузки сервера я замечал одну нехорошую особенность … ZM не запускался. Просмотрев логи в Syslog я нашел следующую строчку:
zmfix[1023]: ERR [Can't connect to server: Can't connect to local MySQL server through socket '/var/run/mysqld/mysqld.sock' (2)]
Оказывается данная проблема уже известна разработчикам, и решение они видят следующее:
Открываем файл /etc/init.d/zoneminder
$ sudo vim /etc/init.d/zoneminder
находим там строчку
zmfix -a
и выше вставляем
sleep 15
перезагружаем машину и радуемся рабочему сервису
8.Материалы, которые использовались для написания этой статьи:
http://forum.lissyara.su/viewtopic.php?f=8&t=13701&p=126748# (Файловая система UFS и ZM)
http://wiki.rsu.edu.ru/index.php/ZoneMinder (Документация от rsu.edu.ru)
http://forum.lissyara.su/viewtopic.php?f=3&t=14226 (Установка ZM на FreeBSD 7)
http://www.lissyara.su/articles/freebsd/programms/zoneminder/ (Установка ZM в Ubuntu)
http://devhead.ru/read/organizaciya-videonablyudeniya-zoneminder-ubuntu/ (Установка ZM в Ubuntu — Форум)
http://www.zoneminder.com/wiki/index.php/Zone_Configuration_Basics (Документация ZM)
http://unixforum.org/index.php?showtopic=100970&st=30 (ZM и OpenSuse)
http://case.net.ru/2009/04/09/watching/ (Установка ZM на FreeBSD 6.4)
http://forum.ubuntu.ru/index.php?topic=123337.0 (Проблемы с производительностью ПК и ZM)
http://www.nclug.ru/forum/zoneminder-dlya-chainika-ili-prelesti-seksa-s-videonablyudeniem (Установка ZM на Debian)
http://www.charliemouse.com/code/cambozola/index.html (Документация Cambozola)
http://forum.ubuntu.ru/index.php?topic=10034.0 (Установка ZM на Ubuntu)
http://www.zoneminder.com/wiki/ (ZM Wiki)
http://www.zoneminder.com/wiki/index.php/FAQ#Zoneminder_doesn.27t_start_automatically_on_boot (автозагрузка zm)
http://www.zoneminder.com/wiki/index.php/Sabayon_Linux_with_ZM_1.22.3_Step-by-Step#Installing_Cambozola (Установка Cambozola)
